How helpful would it be to use a software to automatically sync Calendar information between multiple platforms in the same or different Tenants? CiraHub lets you do just that, reducing errors due to duplicate Calendar items and saving valuable time in the process. This article provides easy steps to two-way sync Calendars Exchange Public Folder Microsoft 365 mailbox. Read on to learn more.
Steps to Two-way Sync Calendars Exchange Public Folder Microsoft 365 Mailbox
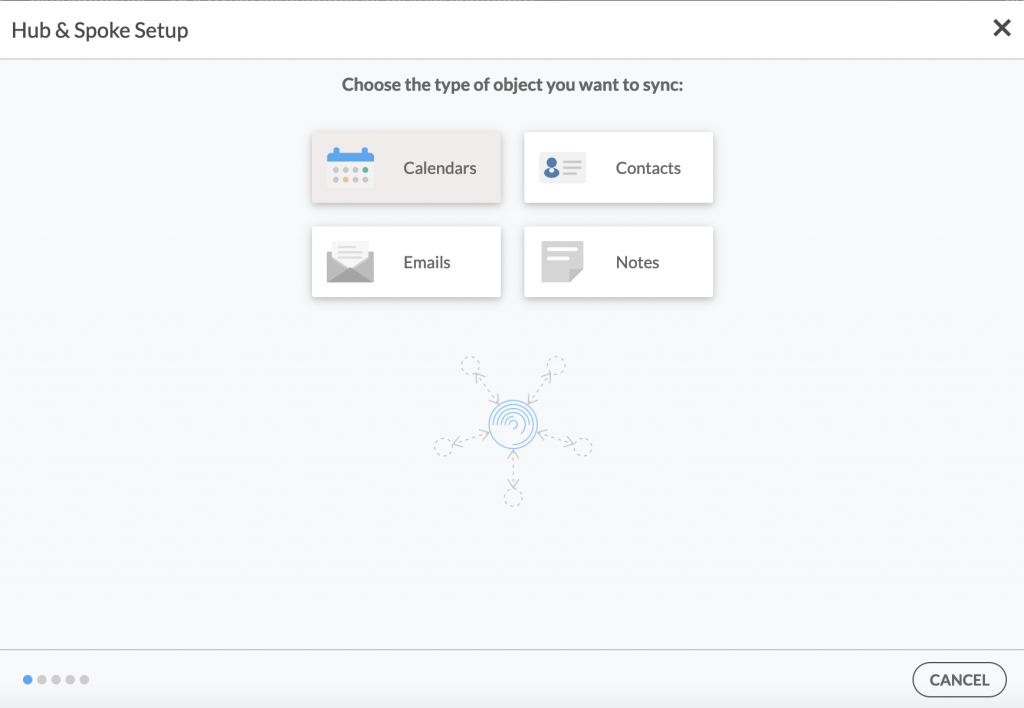
1. Log in to CiraHub. On the Hub & Spoke Setup page, select the Calendars object.
Keep in mind that CiraHub also lets you sync an Microsoft 365 Mailbox calendar with a Public Folder and vice versa.
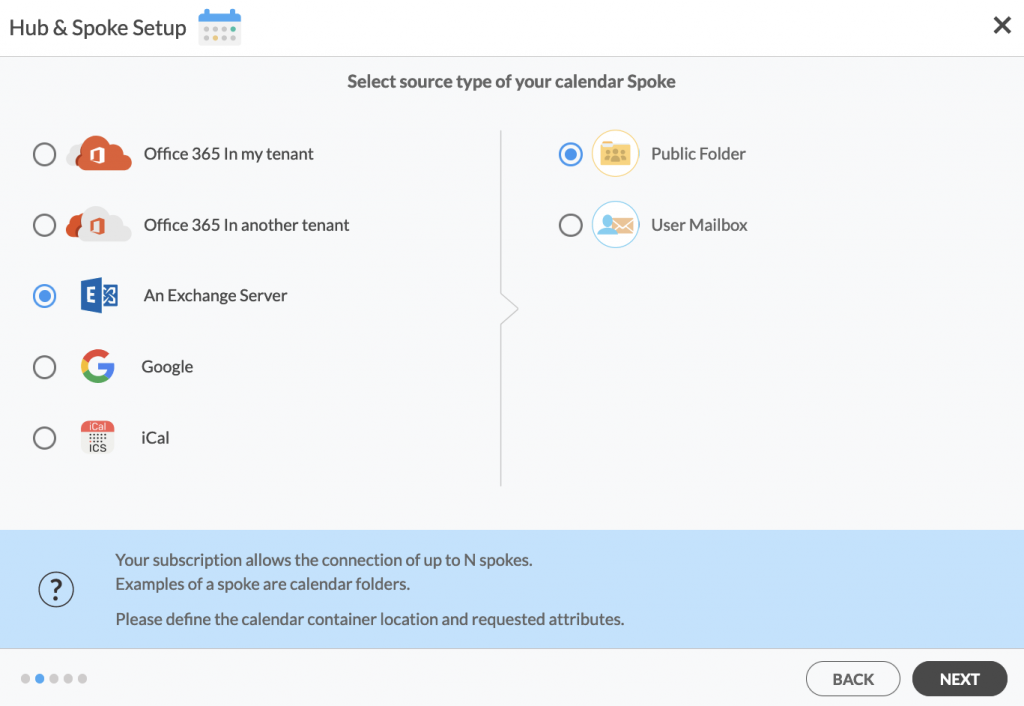
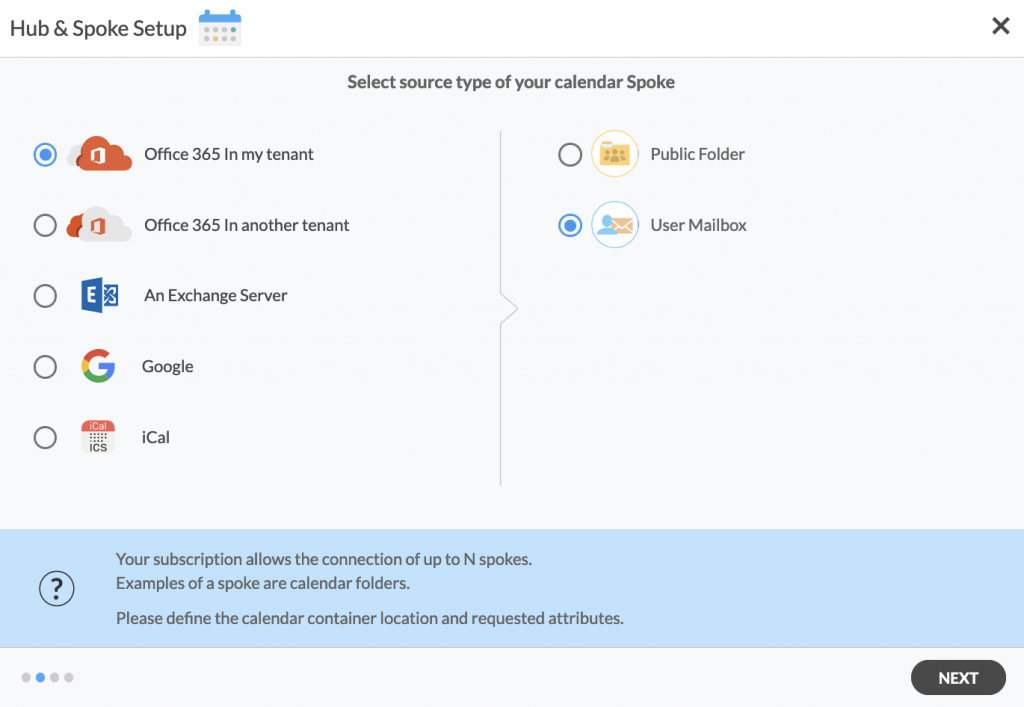
2. Next, select the source type of your contact spoke. To two-way sync Exchange Server Public Folder Calendar, click An Exchange Server and select Public Folder and NEXT (See figure below).
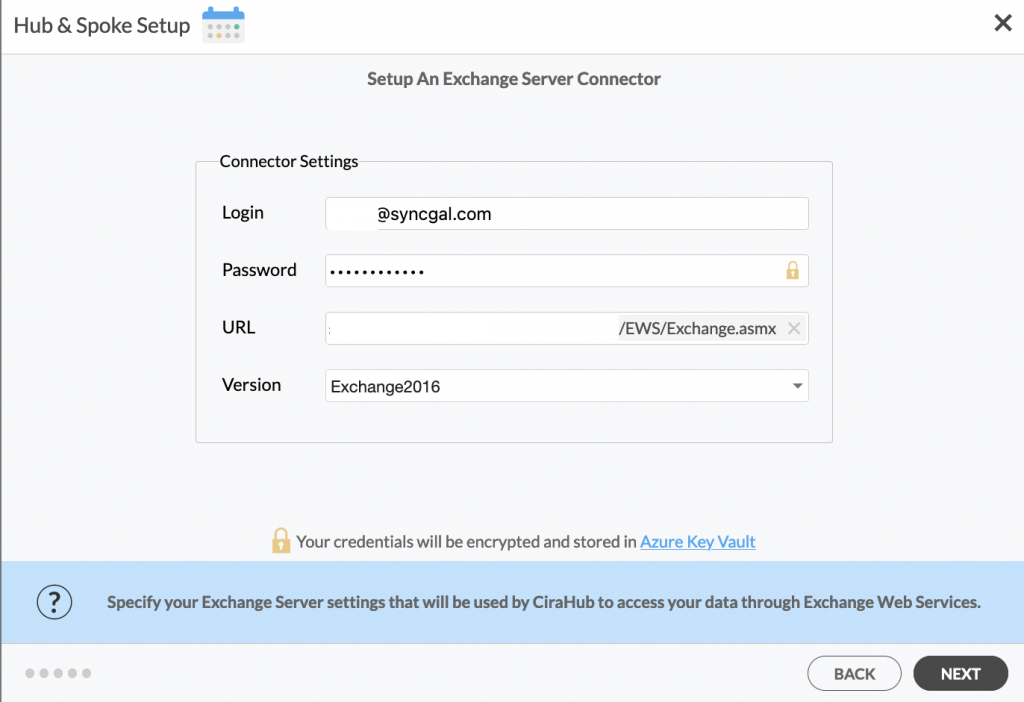
3. Enter your Exchange Server Connector Login, Password, URL, and Exchange Version. If you are running an Exchange Server version dated 2016 or later, always select Exchange 2016 in your connector Settings. You can find this information in your Exchange Server settings. (See figure below).
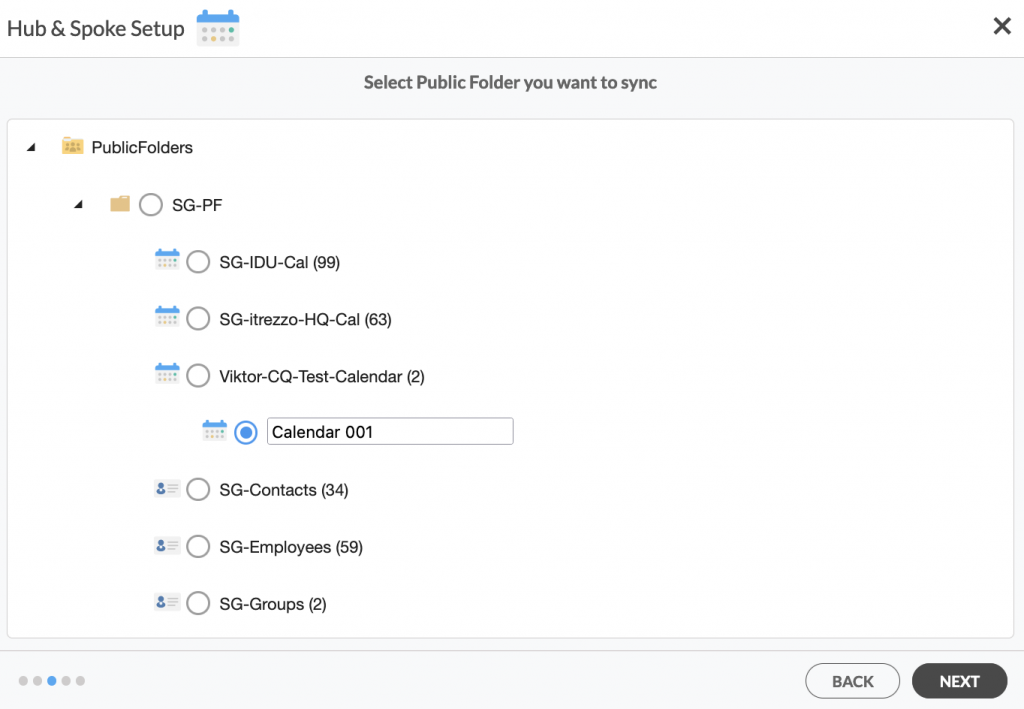
3. Select the Public Folder Calendar you want to sync from the list. Click on the small arrow in front of a subfolder on the right and choose the item or click the green + button to add a new calendar and click NEXT. (See figure below.)
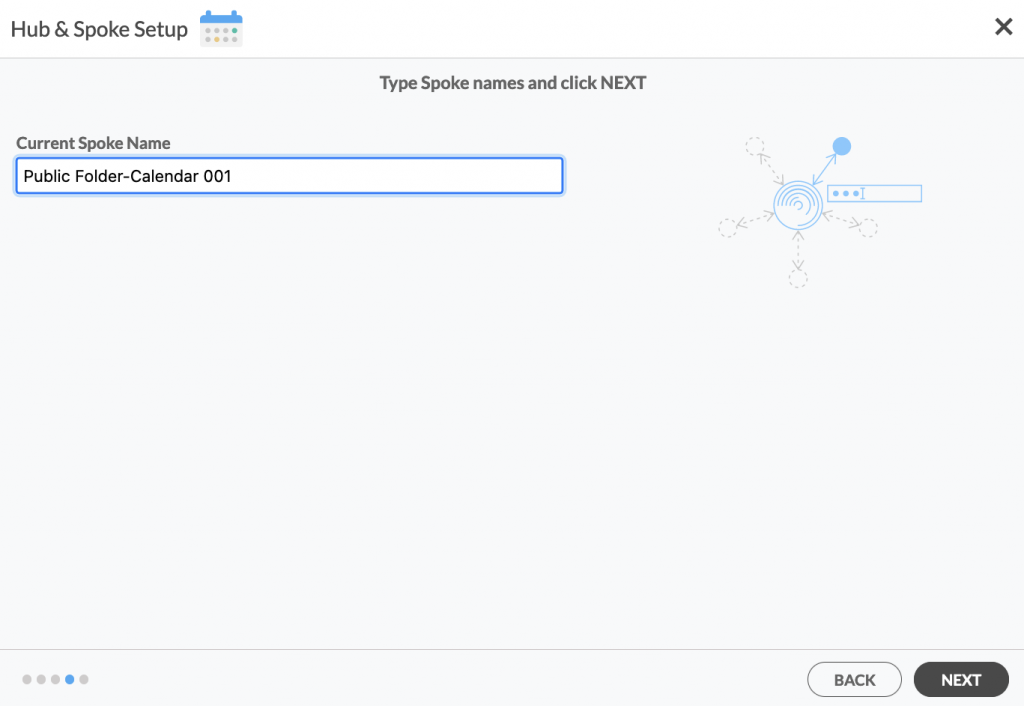
4. Create a name for your first Spoke and click Next. (See figure below.)
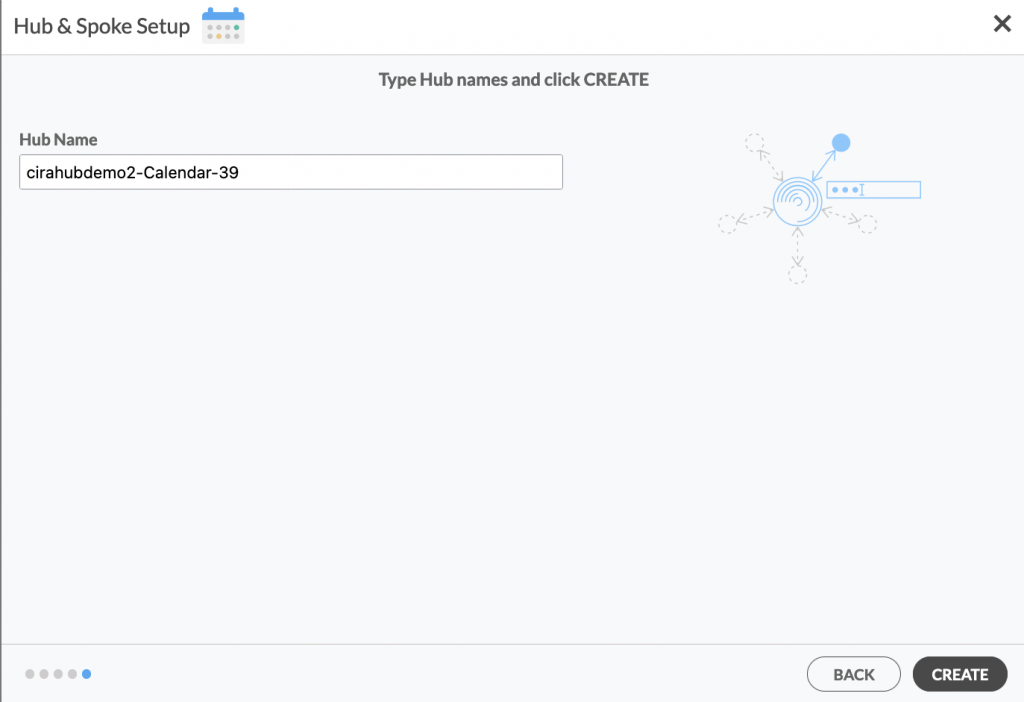
5. Name your Hub, then click CREATE. (See figure below.)
6. To two-way sync Microsoft 365 mailbox calendar with the Exchange Server Public folder you have created, add a Mailbox Calendar using the +Spoke button. Click Microsoft 365 In my tenant, then User Mailbox, and click NEXT.
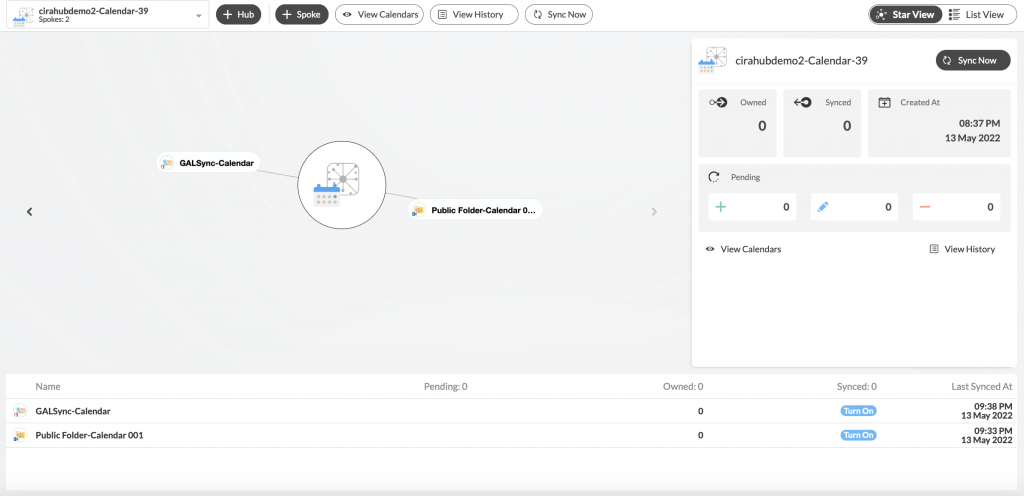
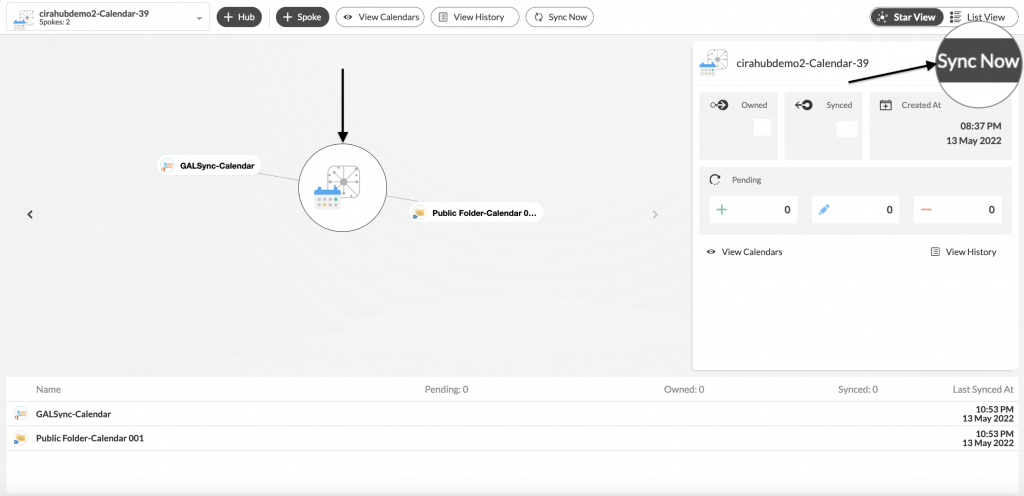
7. Choose a Mailbox Calendar and click next, then name your spoke and click CREATE. You should now see two spokes attached to the Hub on the CiraHub dashboard. You can add more spokes as required. (See figure below.)
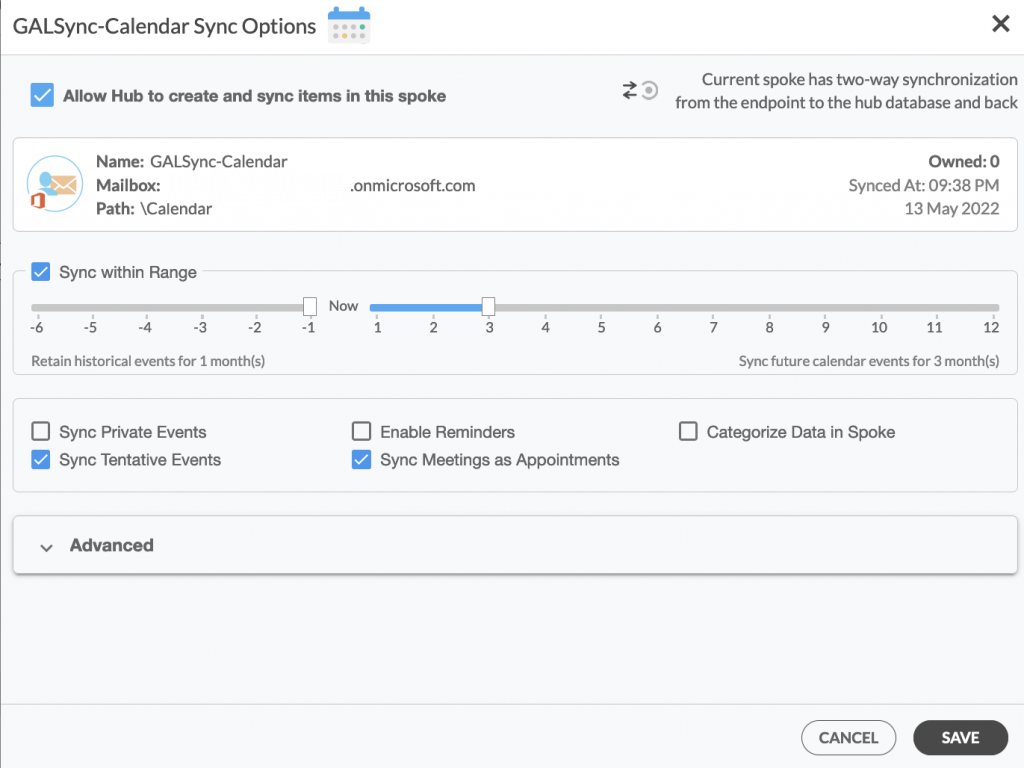
8. Next, right-click on each Spoke, select Sync Options, click Allow Hub to create and sync items in this spoke and click SAVE. (See figure below.)
NOTE
Depending on your organization’s needs, you can utilize a variety of additional sync options, such as private and tentative events, reminders, syncing meetings as appointments, and categorizing data in spokes. You can edit synchronization settings for each of your spokes using the options at the bottom of the page.
9. On the CiraHub Dashboard, click on the Hub, then click Sync Now to two-way sync Calendars Exchange Public Folder Microsoft 365 mailbox. (See figure below.)
Conclusion
With the simple steps above, two-way sync Calendars Exchange Public Folder Microsoft 365 Mailbox is a breeze using CiraHub! CiraHub’s powerful two-way Calendar sync gives users one less thing to worry about by keeping Calendar information constantly updated across multiple platforms with no risk of duplicates or errors.
Learn More About CiraHub!
CiraHub is a two-way sync platform for shared contacts and calendars for Microsoft 365, Exchange Server, and other Microsoft Enterprise Applications users. The software is designed to make it easy for people lacking IT expertise to set up shared contact and calendar sync for their company. Get started with your own sync today!
