Onboarding CiraHub
CiraHub is the Cira Apps Ltd. response to a demand for a two-way sync solution for shared contacts and calendars. In its current state, CiraHub is a many-to-many two-way sync solution platform for organizations running Microsoft Enterprise Applications.
The platform is designed for those without IT experience to be able to easily set up shared contact and calendar sync for their organization.
This guide shows the onboarding process of CiraHub by creating a Contact Hub.
Instructions
- Log in to CiraHub. You will be taken to the onboarding wizard. (See figure below.)
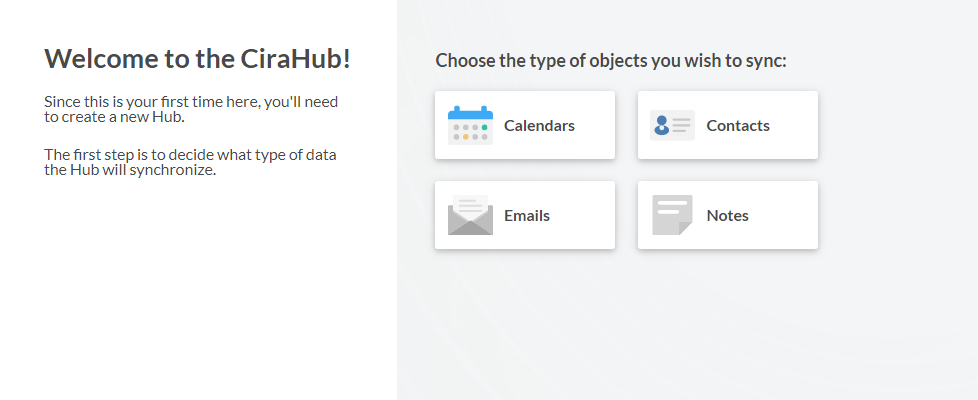
- Select the object type of the first hub. In this example, select Contacts. Select source type of your contact Spoke part of the wizard will appear. (See figure below.)
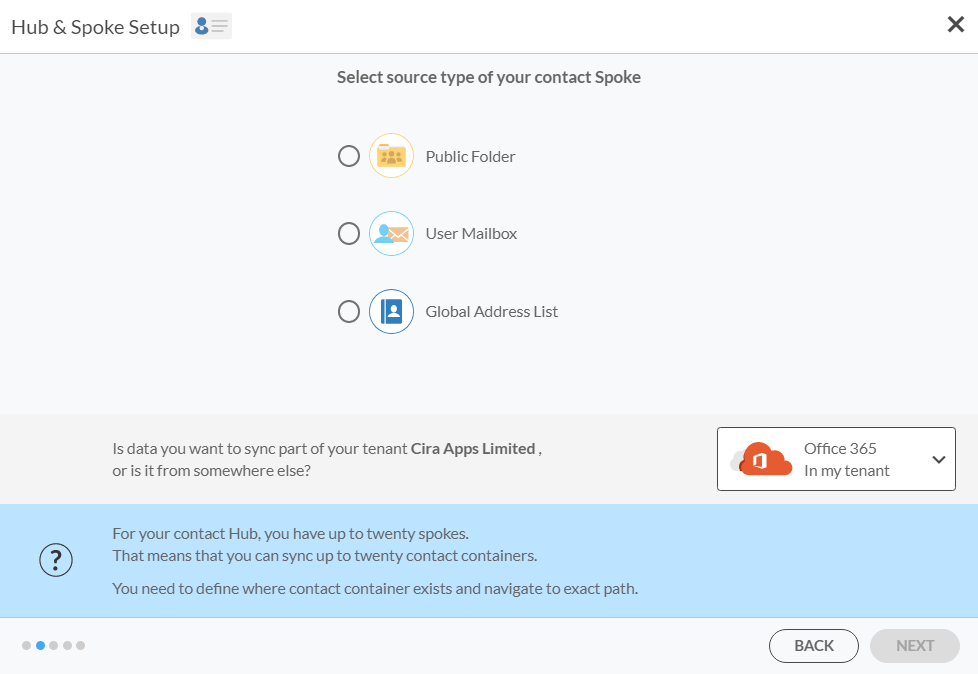
- Select the source type of the Contact Hub and Spoke. In this example, select User Mailbox.
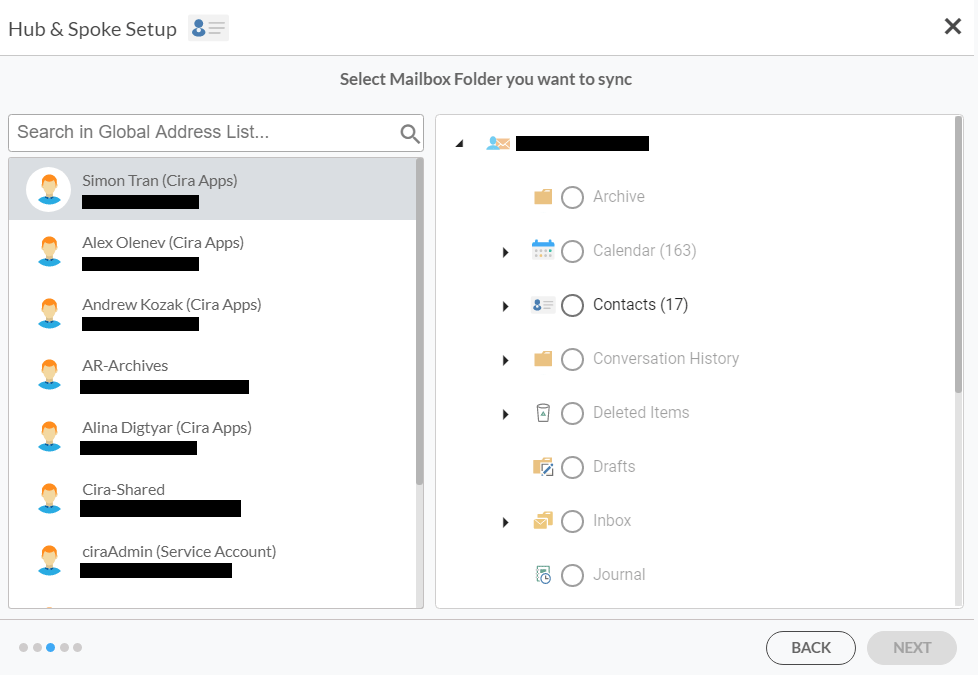
- Click NEXT. Select Mailbox Folder you want to sync will appear. (See figure below.)

- Select the mailbox you want to sync. NOTE: Ideally, the source mailbox will be yours or a mailbox you have access to.
- Select the mailbox folder you want to sync. In this example, select Contacts to sync contacts from the root Contacts folder. NOTE: Click the arrow next to the desired root mailbox folder to expand the folder. This will show all the subfolders within the mailbox folder.NOTE: Hover the mouse over Contacts and click the + to create a subfolder, which can also be used to create a hub and spoke.
- Click Next. Type Spoke Names and click NEXT will appear. NOTE: When creating a Hub, a Spoke is created for the mailbox source.NOTE: The name of the Spoke automatically defaults to the name of the folder used in the Select Mailbox Folder you want to sync portion of the onboarding wizard.
- Name the Spoke.
- Click NEXT. You will be taken to Type Hub names and click CREATE.
- Name the Hub.
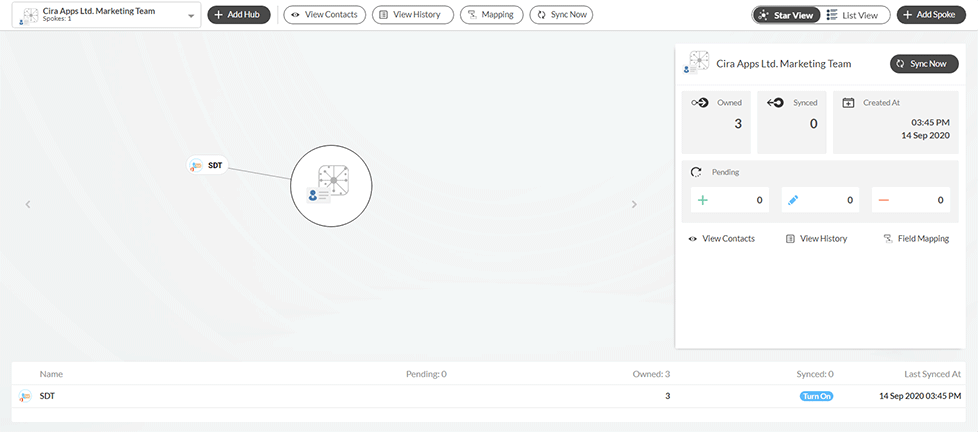
- Click CREATE. You will be taken to the CiraHub dashboard. (See figures below.)
 CiraHub in Star View
 CiraHub in List View. NOTE: Star View is the CiraHub default view. To switch between views, click the slider at the top-right corner of the dashboard.NOTE: By default, all hubs and spokes that are created and attached will have two-way sync automatically disabled. This allows CiraHub users the chance to create custom filters for their two-way sync and makes it easier for the Cira Apps Ltd. Customer Success Team to be able to troubleshoot any problems that may occur during the use of CiraHub easier.
 - Click the spoke that was just created on the diagram.
- Click Turn On under the Synced tile. NOTE: You can also click Turn On in the list at the bottom of the dashboard.The Spoke Sync Options will open. (See figure below.)NOTE: In List View, click Turn On under the Synced column.

- Click the Allow Hub to create and sync items in this spoke checkbox to enable two-way sync. NOTE: Click Advanced to add sync filters to this spoke.
- Click SAVE.
 CiraHub in Star View
 CiraHub in List View.
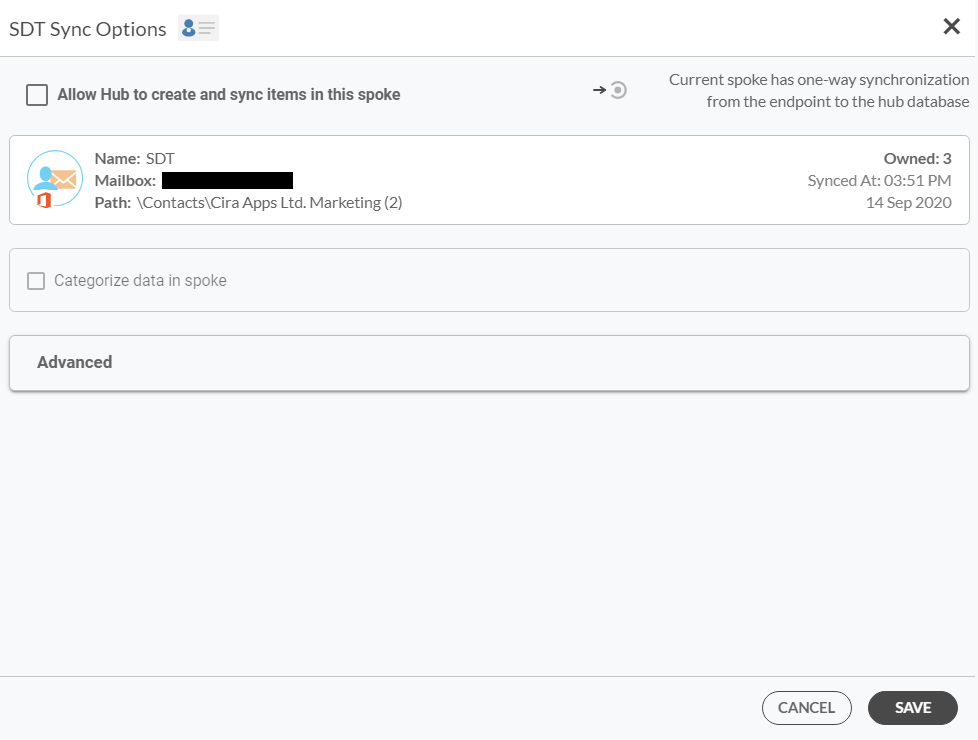
Get a taste of Two-Way Sync. Try CiraHub Today.
All you can eat with CiraHub. Unlimited Spokes and Hubs free for 60 days. Get Started Today.
