This comprehensive article will outline how to two-way sync contacts between Deal Cloud and QuickBooks.
Syncing contacts in these two platforms offers plenty of benefits for organizations of all sizes. Deal Cloud provides a window into customer interaction, buyer, and sales opportunity. QuickBooks paints a complete picture by showing all financial transactions coupled with payments and invoices. Synchronizing the contacts in the two platforms provides sales departments with much better understanding not only on how the customers have interacted but also financial implication resulting from those interactions.
Thanks to this Two-way sync feature, you can:
- Two-way sync Deal Cloud contacts with QuickBooks.
- Update contacts simultaneously across the two platforms
- Without producing duplicates, CiraHub effortlessly syncs and moves data from Deal Cloud to QuickBooks.
This article will show you how to enable a two-way contact sync between Deal Cloud and QuickBooks.
Set Up a Two-Way Contact Sync Between Deal Cloud and QuickBooks
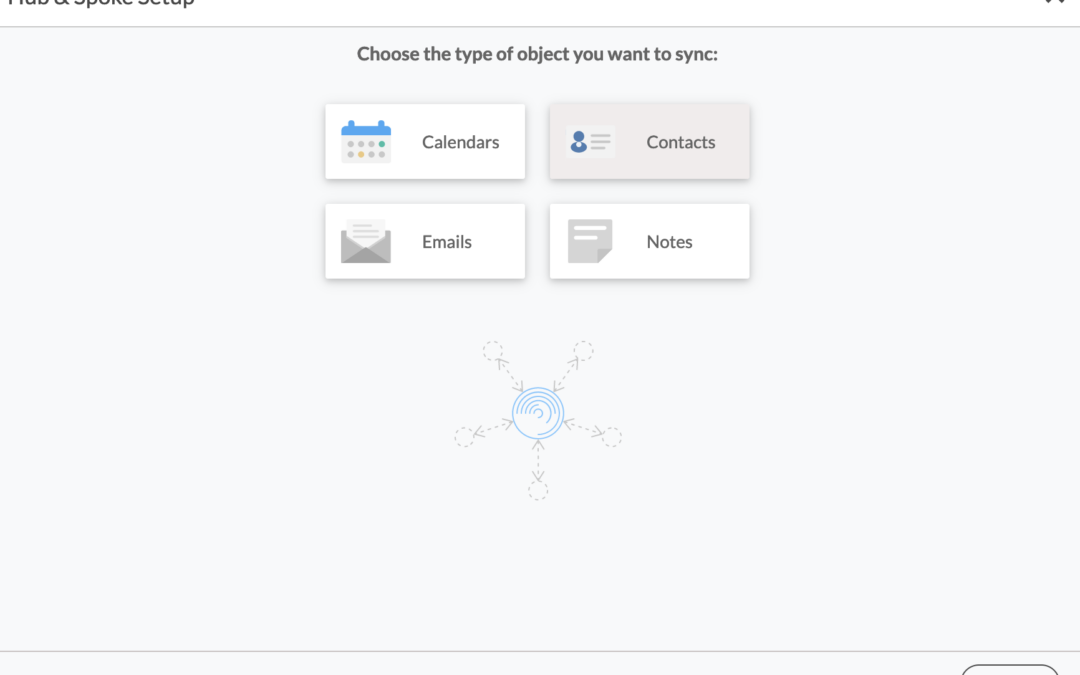
1. Log in to CiraHub. It will take you to the onboarding wizard. (See figure below.) Next, select the object you want to sync. In this example, the “Contacts” object has been selected. 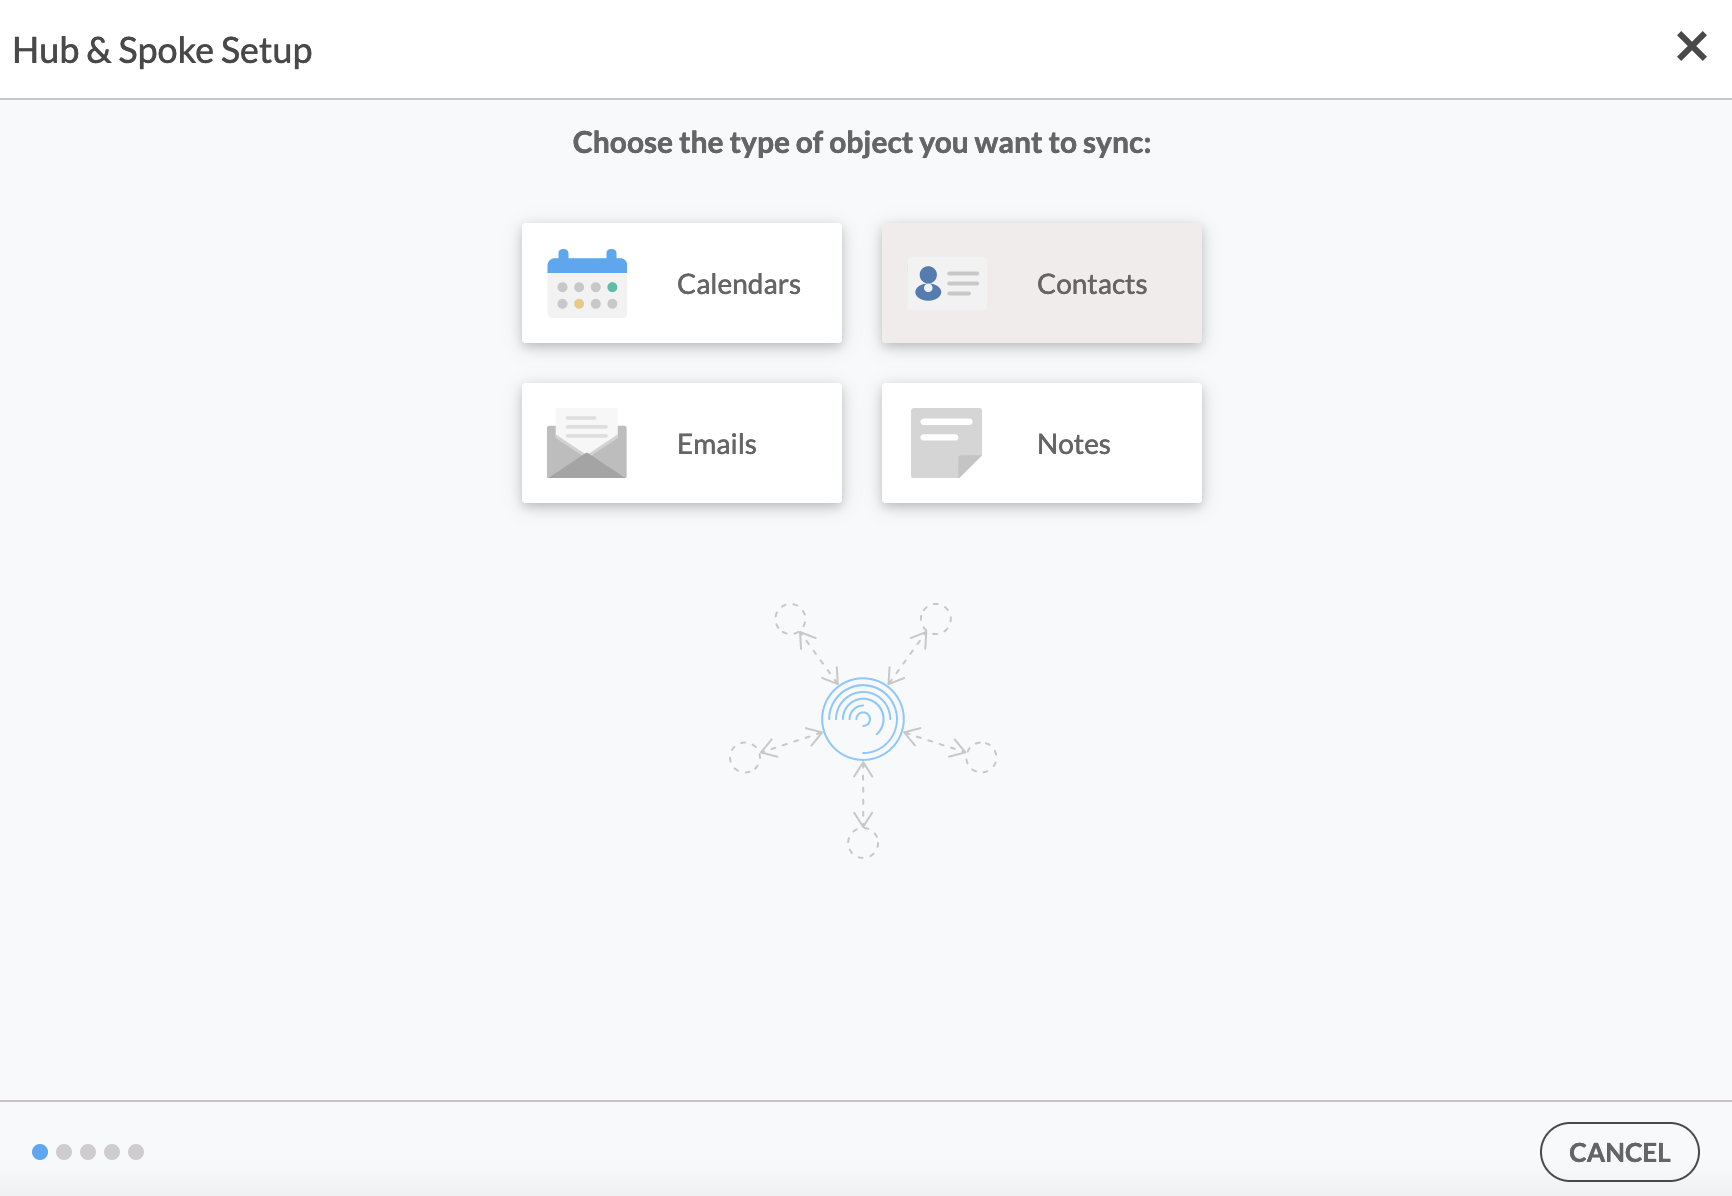
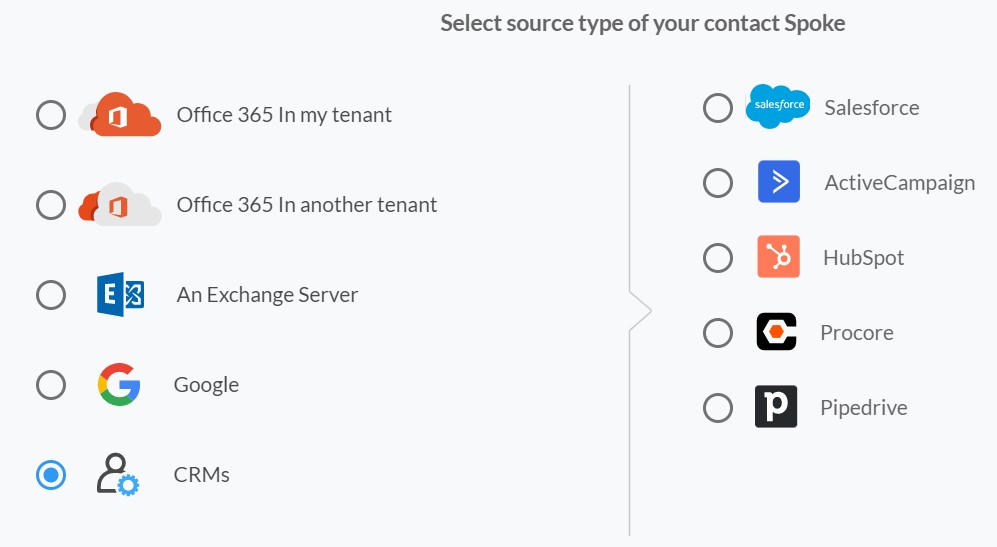
2. Next, start the Hub and Spoke setup. Click on “CRMs” as your source type for your contact spoke. (The Hub contains all synced Contacts from each spoke; a spoke can be a Public Folder, a user mailbox, the GAL or a CRM.)
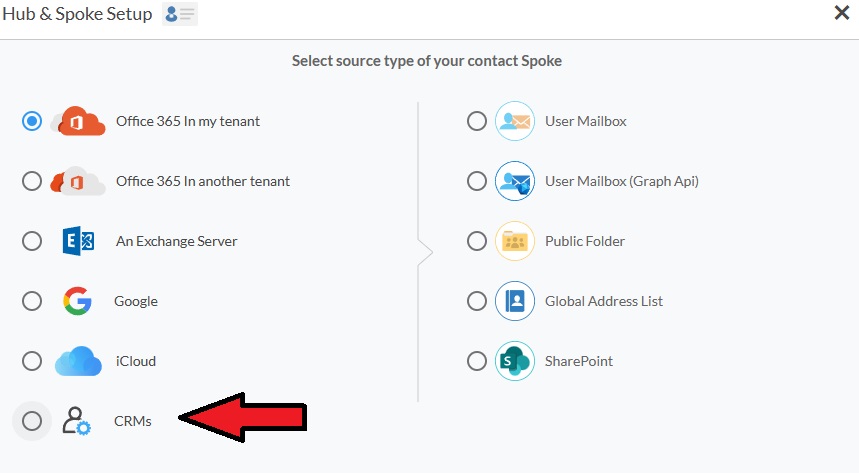
3. Select Deal Cloud as the contact spoke type.
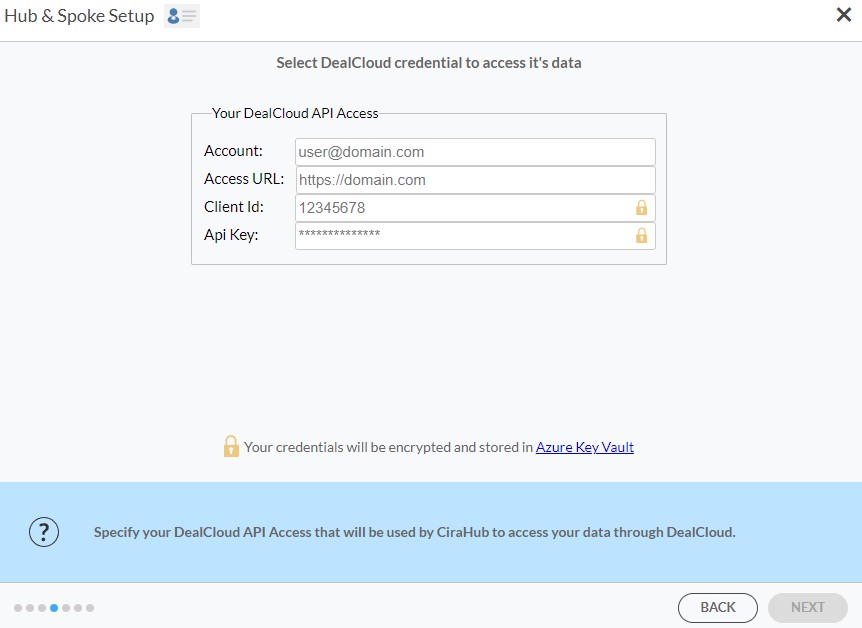
4. Type in Deal Cloud API Access information to sync its account data to CiraHub.
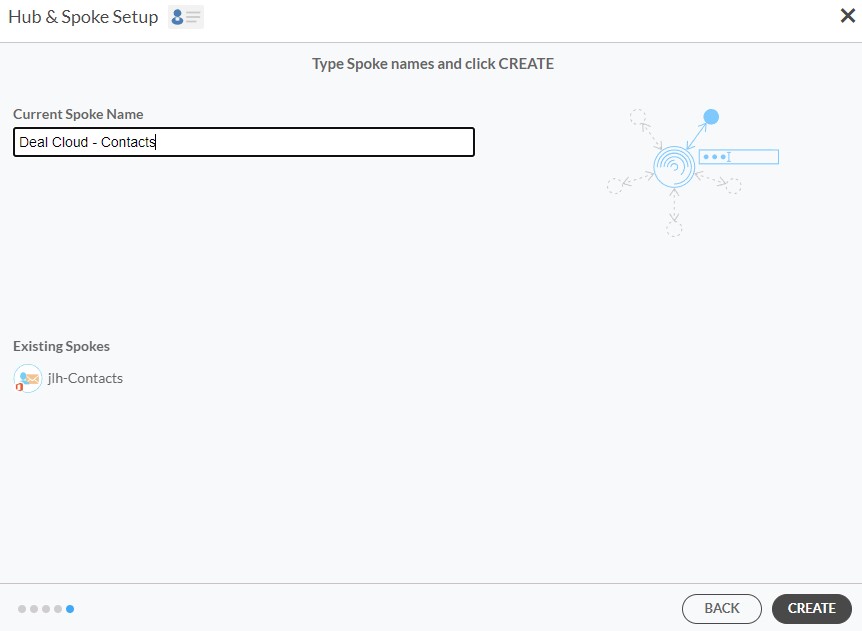
5. Type in a Spoke name and click Create.
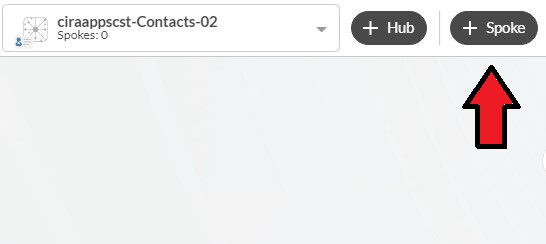
6. Select the option to add an Additional Spoke.
Step 2: Create a Spoke for QuickBooks
7. Next, start the Hub and Spoke setup. Click on “CRMs” as your source type for your contact spoke. (The Hub contains all synced Contacts from each spoke.
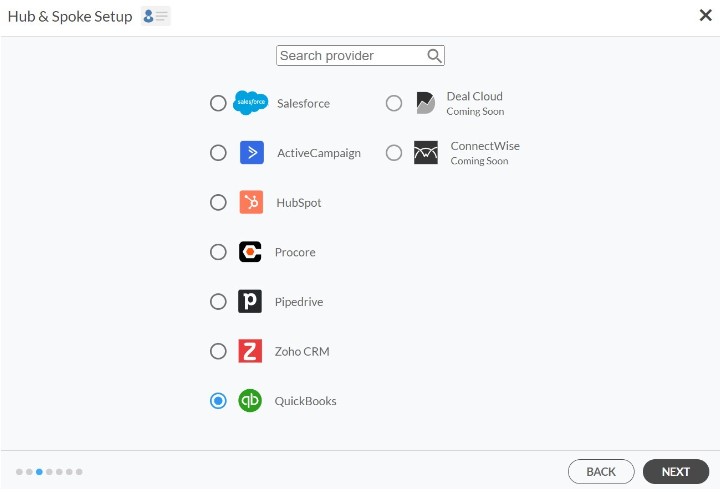
8. Select QuickBooks as the contact spoke type.
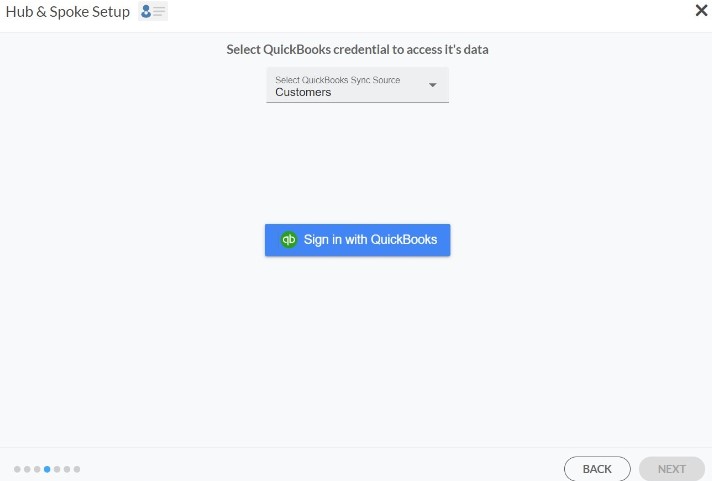
9. Click Sign in with QuickBooks.
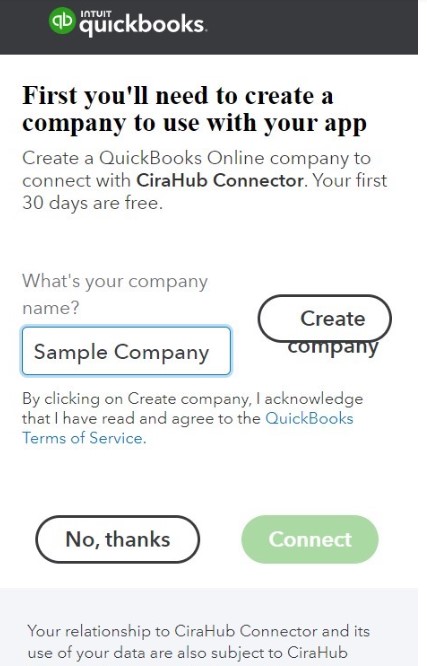
10. Enter in the Name of your Company in QuickBooks and Click “Create Company” to connect with the CiraHub Connector.
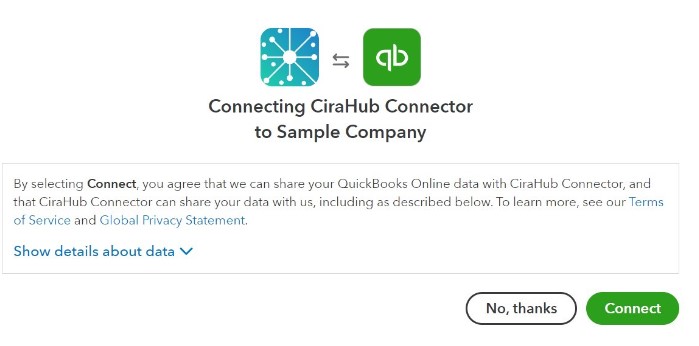
11. Click Connect to Share your QuickBooks data with the CiraHub Connector.
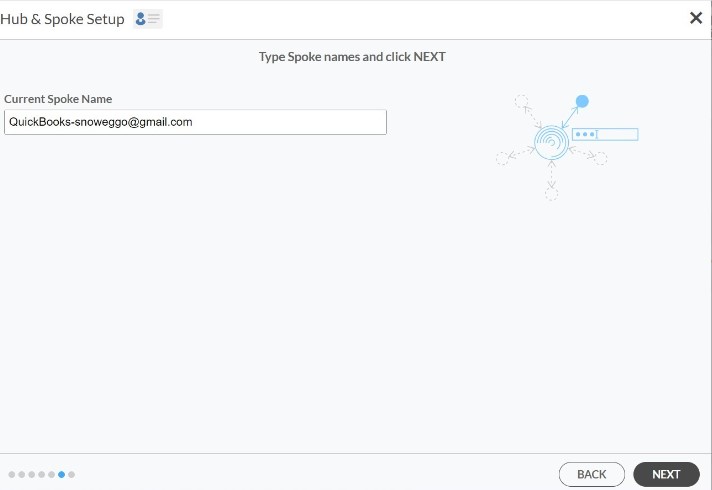
12. Type in a Spoke name and click NEXT.
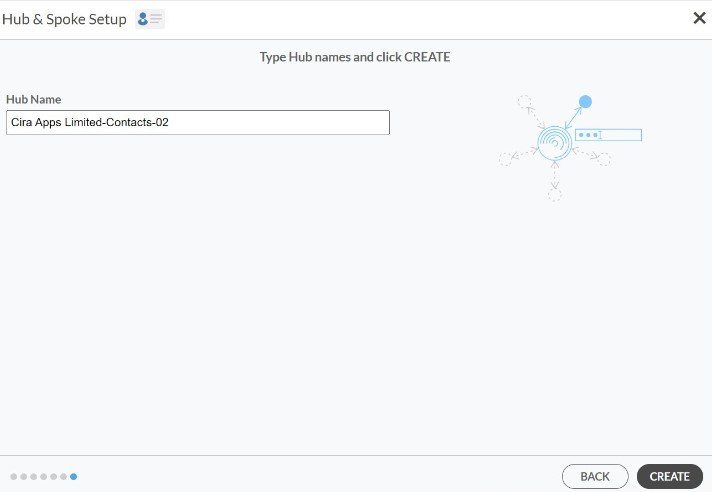
13. Type in a Hub name and Click CREATE.
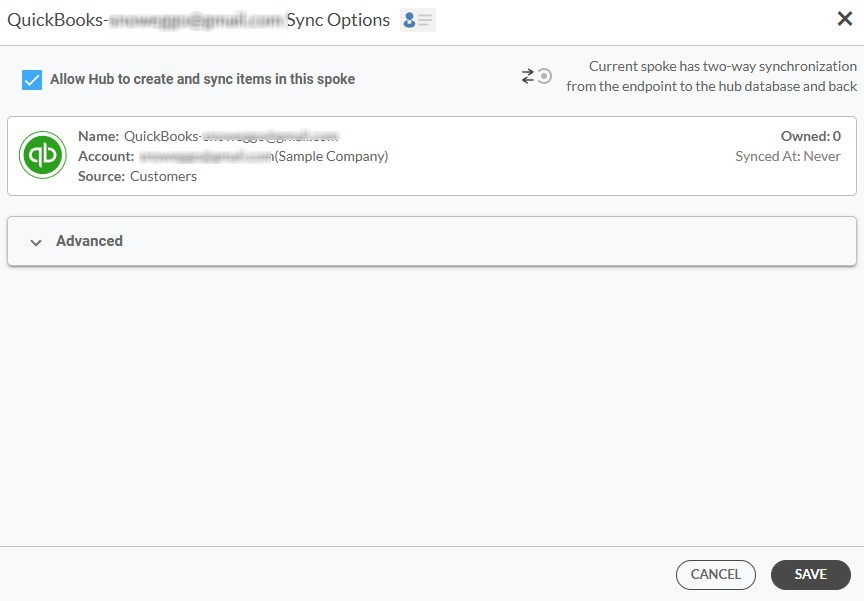
16. Next, right click your spoke, and select “Sync Options”. From there click the box “Allow Hub to create and sync items in this spoke.” This will enable 2-way synchronization between the Hub and your spoke.

17. Click on “Allow Hub” to create and sync items in this spoke. This will enable two-way synchronization from the endpoint to the Hub database and back.
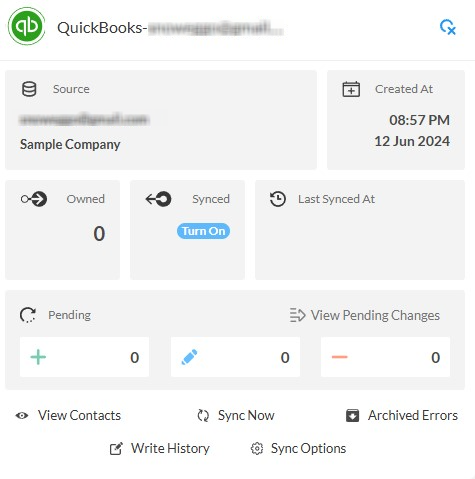
18. Click on “Sync now” in order to enable a 2-way sync for the current spoke to two-way sync between an Exchange Server Mailbox and a Microsoft 365 Public Folder. You can also edit any synchronization options for each of your spokes down below.
Learn More About CiraHub!
CiraHub is a two-way sync platform for shared contacts and calendars for Microsoft 365, Exchange Server, and other Microsoft Enterprise Applications users. The software is designed to make it easy for people lacking IT expertise to set up shared contact and calendar sync for their company. Click here to learn more about how you can start a CiraHub trial today!
