CiraHub allows for a two-way sync with Public Folder items. This guide shows how to create a Public Folder Hub and Spoke for Contacts.
Instructions
- Log in to the CiraHub dashboard. NOTE: If this is the first time you have logged in to CiraHub or have deleted all Hubs from CiraHub, you will see the CiraHub Onboarding Wizard instead.
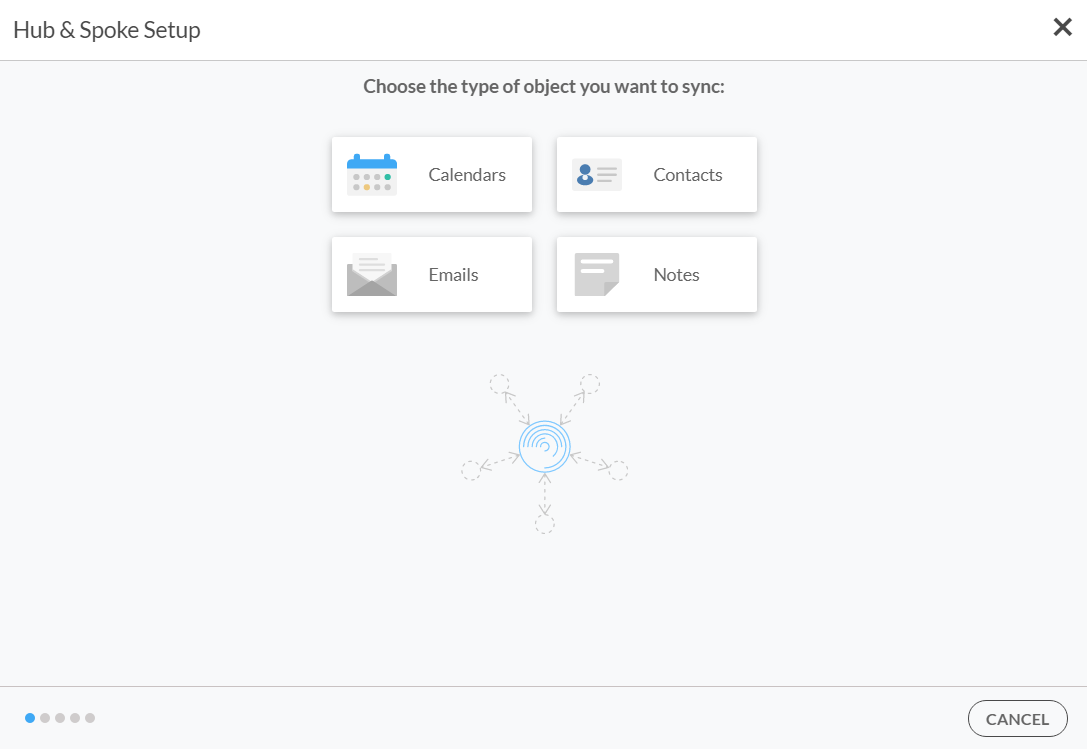
- Click +Add Hub at the top of the dashboard. Choose the type of object you want to sync of the Hub Setup Wizard will appear. (See figure below.)NOTE: CiraHub can also sync object types with different data sources. For example, syncing Public Folder contacts with contacts from the GAL. If you want to sync your Public Folder Contacts to another data source, click +Add Spoke in the appropriate Hub.

- Select Contacts. Select source type of your calendar Spoke of the wizard will appear.
- Select the source type of the hub and spoke. In this example, select Public Folder.
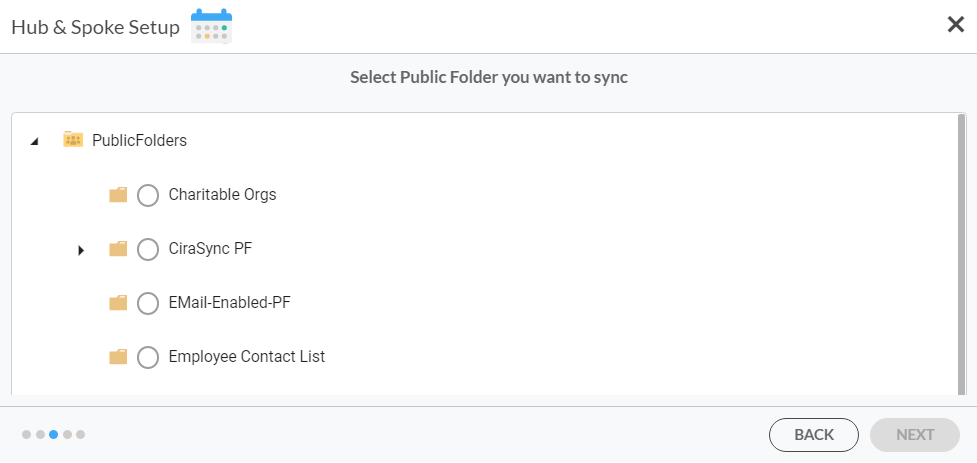
- Click NEXT. Select Public Folder you want to sync will appear. (See figure below.)

- Select the Public Folder you wish to sync. NOTE: Click the arrow next to the desired root mailbox folder to expand the folder. This will show all the subfolders within the mailbox folder.NOTE: Hover the mouse over a Public Folder, and click the + to create a subfolder. A new subfolder can be used to create a hub and spoke.
- Click NEXT. You will be taken to Type spoke names and click NEXT.
- Name the Spoke.
- Click NEXT. You will be taken to Type Hub names and click CREATE.
- Name the Hub.
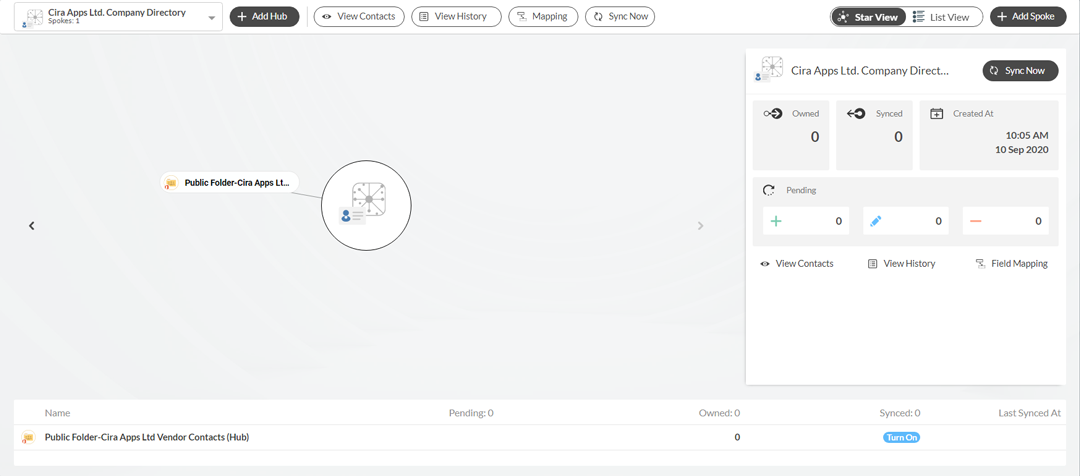
- Click CREATE. You will return to the CiraHub dashboard.(See figure below.)

- Click the Spoke that was just created on the diagram.
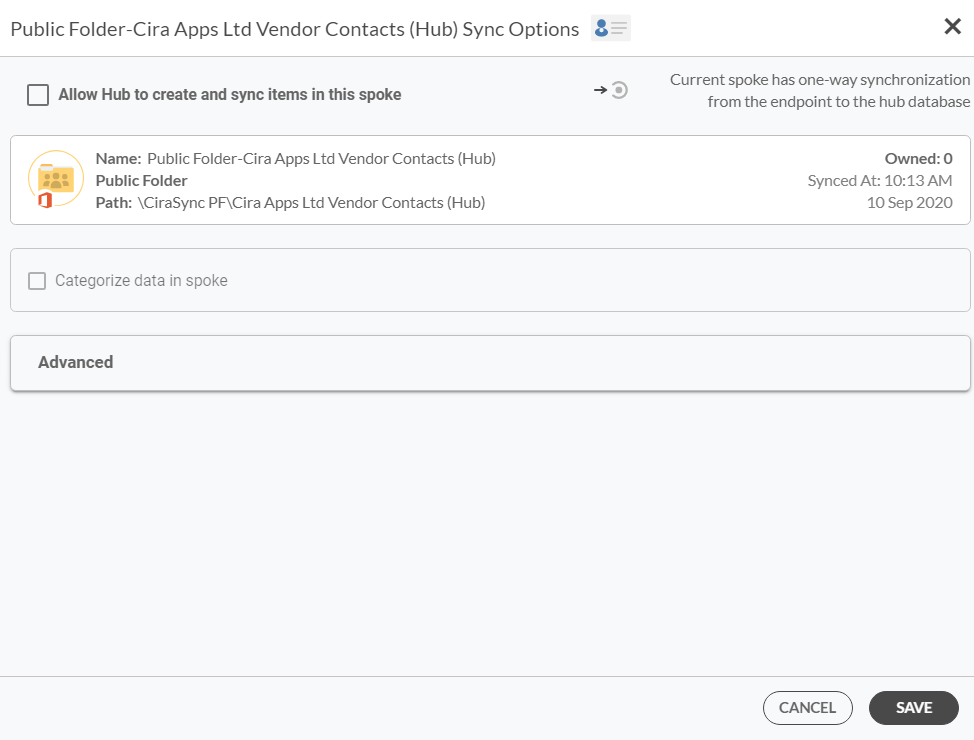
- Click Turn On under the Synced tile. The Spoke Sync Options will open. (See figure below.)NOTE: You can also click Turn On in the list at the bottom of the dashboard.

- Click the Allow Hub to create and sync items in this spoke checkbox to enable two-way sync in the spoke. NOTE: You can click the drop-down arrow in Advanced to access and set Advanced filters.
- Click SAVE. NOTE: To attach a Spoke to the Hub that was just created, click +Add Spoke at the top of the dashboard. More on how to attach a spoke can be found in the Attaching a Spoke to a Hub article.