Onboarding CiraHub
Attaching a Spoke to a Hub
A Spoke is a data endpoint used by the hub to pull data from and push data to. When creating a Hub, a Spoke is automatically created to represent the data endpoint the Hub uses to pull the initial data from.
This guide shows how to attach a Spoke to a Hub.
Instructions
Creating the Spoke & Sending the CiraHub Invitation
- Click + Add Spoke in the top right-corner of the dashboard. Select source type of your Spoke will appear. (See figure below.)NOTE: If in List View, click + Add Spoke in the top-right corner of the desired hub pane to begin adding a Spoke.
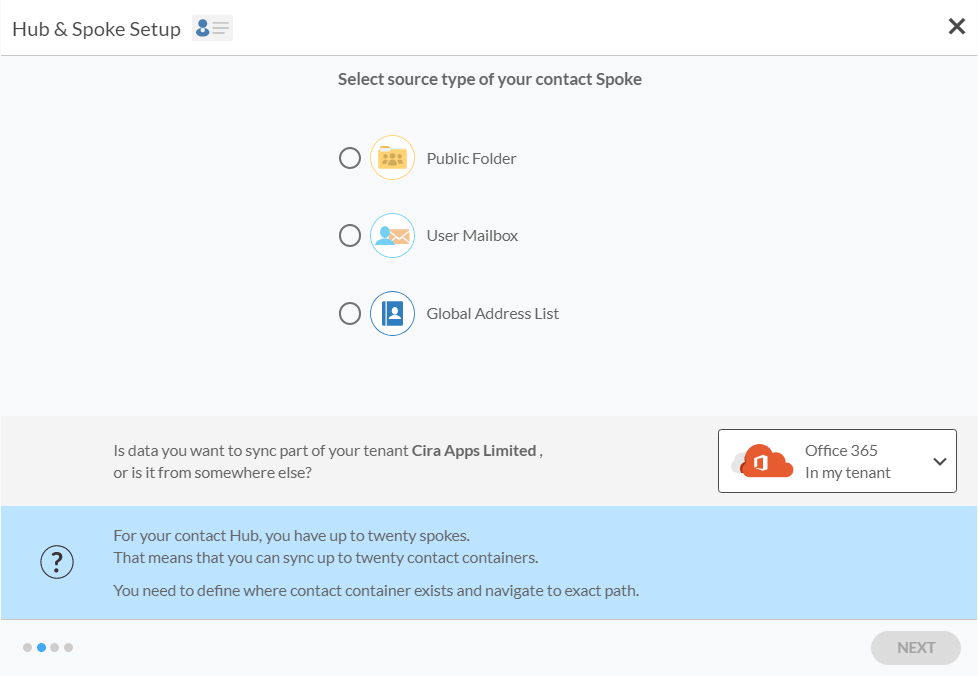
- In this example, click User Mailbox.
- Click NEXT. Select Mailbox Folder you want to sync will appear. (See figure below.)

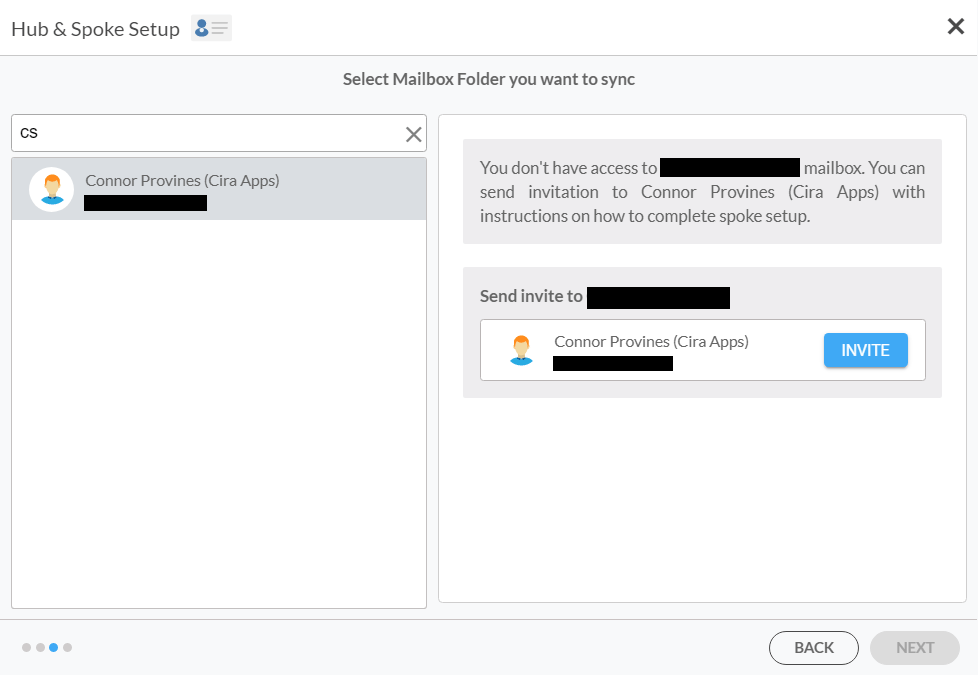
- Select the desired user mailbox to add as a Spoke. NOTE: CiraHub will automatically read mailbox access permissions. If you do not have permission to access the desired user mailbox, the following will appear. (See figure below.)
- Click Invite. You will be taken to Type Spoke names and click CREATE.NOTE: If you do have access to the desired mailbox, please follow Steps 6–9 of Onboarding CiraHub.
- Name the Spoke.
- Click CREATE. The CiraHub dashboard will appear.NOTE: Click Allow invitee to specify folder if you want to allow the invitee to finish the Spoke setup.

Accepting the Invitation & Completing Spoke Setup
NOTE: Steps 1–4 must be completed by the invitee.
- The invitee accepts the email invitation.
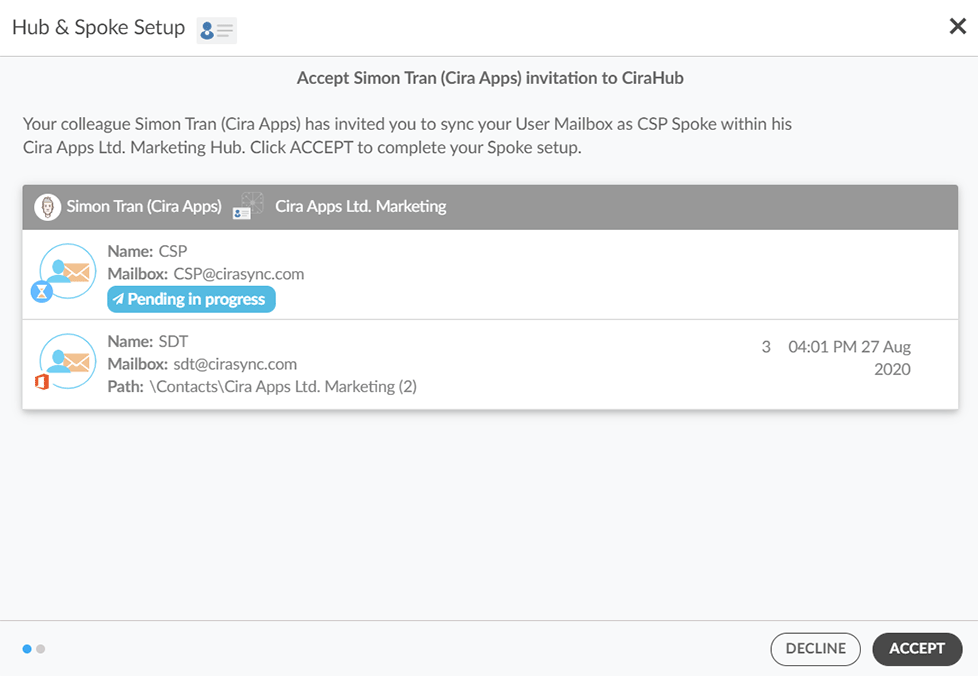
- The invitee will log in to CiraHub. The CiraHub invitation will appear. (See figure below.)

- The invitee will click ACCEPT. A thank-you message will appear.
- The invitee will click CLOSE. NOTE: Starting from Step 5, the user who sent the invite will take over the setup of the Spoke.NOTE: If in Step 9 of Creating the Spoke & Sending the Invitation, the Allow invitee to specify folder checkbox was checked, the invitee will take over in completing the Spoke setup.
- Refresh the dashboard.
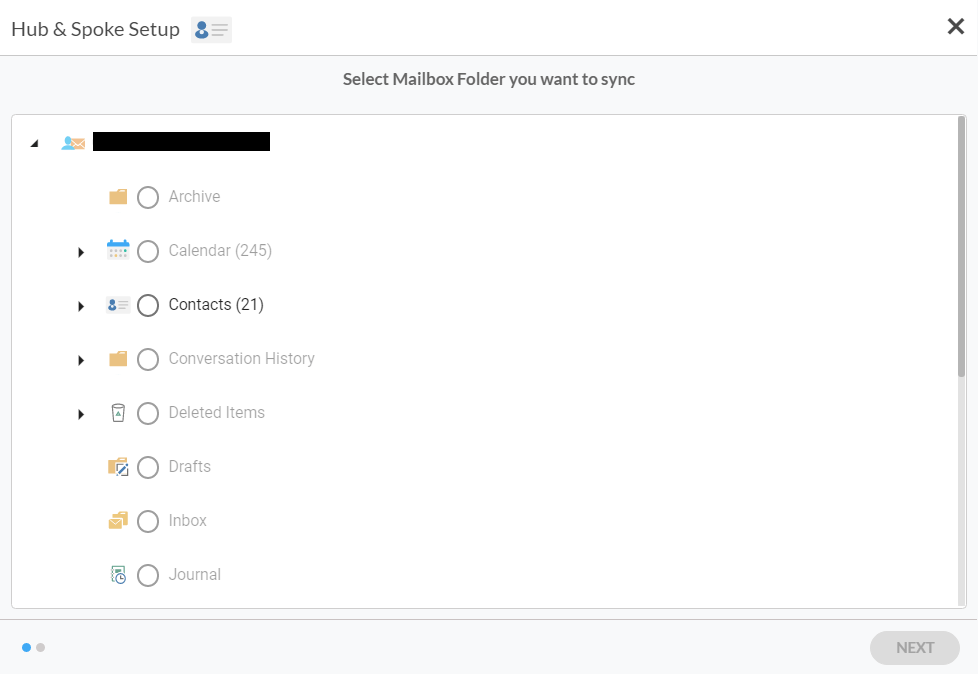
- Click Complete invite acceptance in the list at the bottom of the dashboard. Select Mailbox Folder you want to sync will appear. (See figure below.)

- Select the mailbox folder you want to sync the Hub data to. NOTE: Click the arrow next to the desired root mailbox folder to expand the folder. This will show all the subfolders within the root mailbox folder. Alternatively, hover the mouse next to a root mailbox folder and click the + to create a subfolder.
- Click NEXT. You will be taken to Type Spoke names and click CREATE.
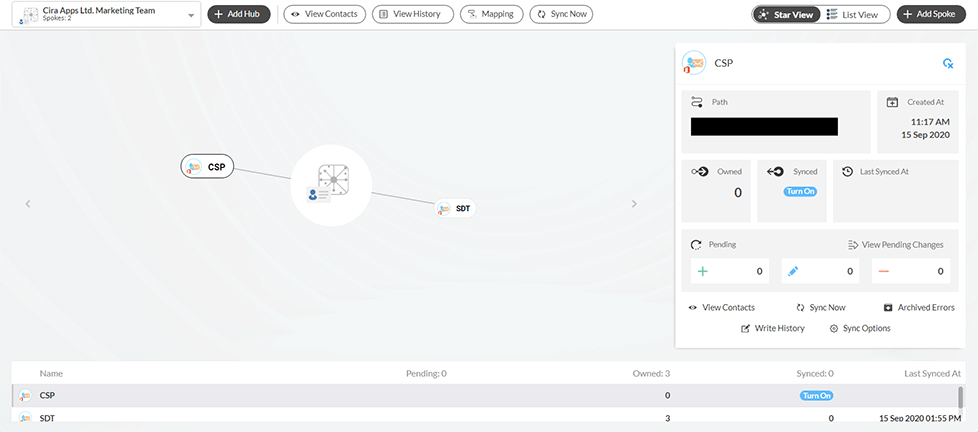
- Click SAVE. You will be taken to the CiraHub Dashboard. (See figure below.)

- Click Turn On under the Synced tile in the Spoke that has just been attached to the Hub. NOTE: You can also click Turn On in the list at the bottom of the dashboard.NOTE: In List View, click Turn On under the Synced column.

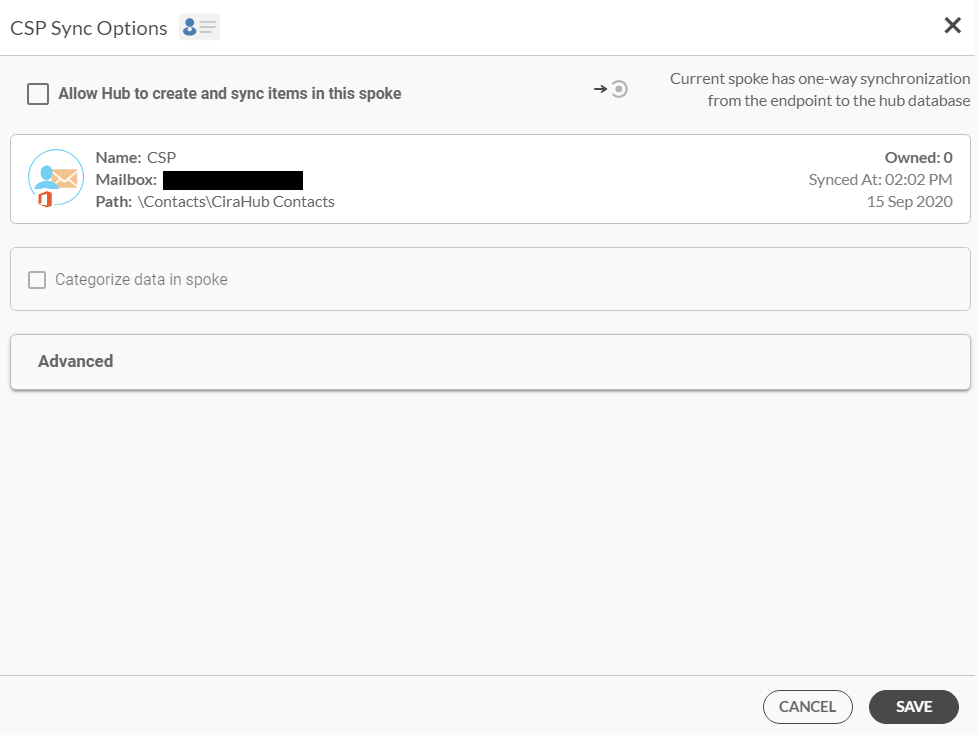
- Click the Allow Hub to create and sync items in this spoke checkbox to enable two-way sync.NOTE: Click Advanced to add sync filters to this Spoke.
- Click SAVE.
Get a taste of Two-Way Sync. Try CiraHub Today.
All you can eat with CiraHub. Unlimited Spokes and Hubs free for 10 days. Get Started Today.
