Condition and subgroup settings in CiraHub serve as more than just data filtering features; they help organization refine and optimize their data management strategy. By segmenting data into smaller, relevant subsets, you ensure that only necessary information is synchronized across platforms.
Let’s walk through the process of adding subgroups to your sync setup and explain why conditions and are essential for effective data management.
What Are Conditions and Subgroups?
Conditions define the criteria that data must meet to be included in a synchronization. For example, a condition might specify that only contacts from a particular department or those with specific email domains should be synchronized. Subgroups on the other hand further refine the process by grouping data based on shared characteristics, such as geographic location, job roles, or organizational departments
Step-by-Step Guide to Adding Conditions and Subgroups
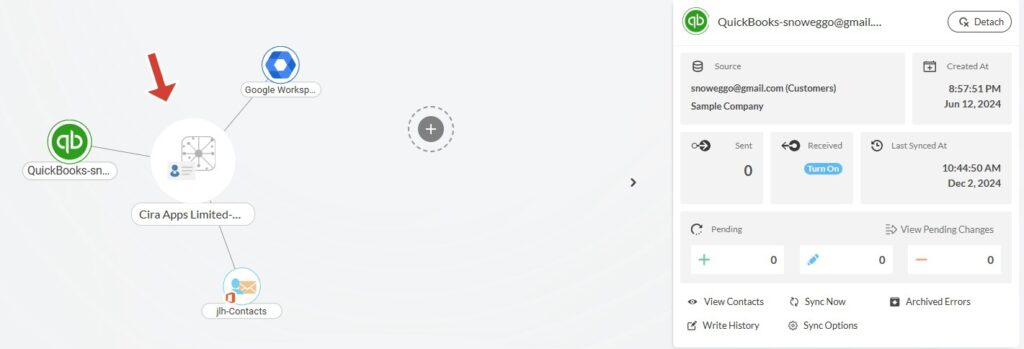
1. Start by logging into your CiraHub account using your credentials. Once logged in, you’ll have access to your existing hub-and-spoke synchronization setups.
2. Navigate to the synchronization setup where you’d like to add subgroups.
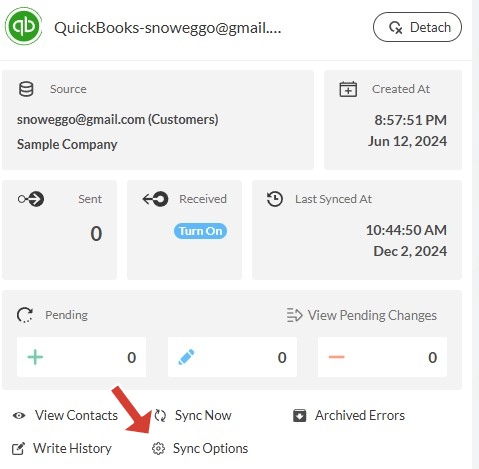
3. Click on the “Sync Options” button for the spoke you wish to modify. This will open a configuration panel with various settings for that specific spoke.
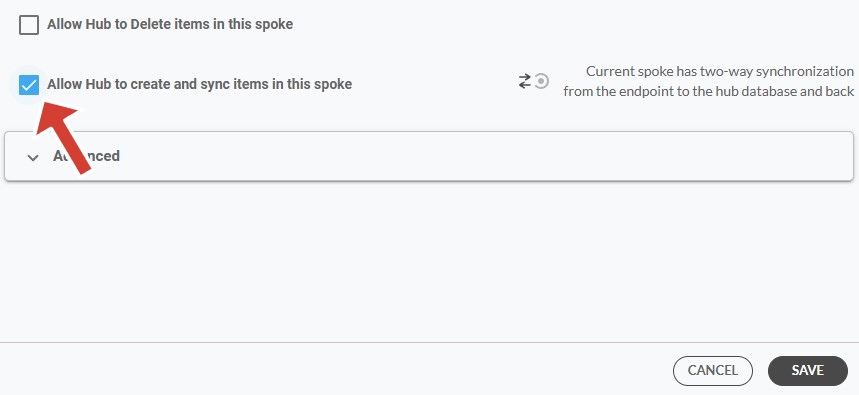
4. In the sync options panel, look for the setting labeled “Allow Hub to Create and Sync Items in This Spoke.” Enable this option to ensure that the hub can actively push updates and synchronize data with the spoke.
5. Once the hub’s sync permissions are enabled, click on the “Advanced” tab. This section allows you to define subgroups and conditions for your synchronization.
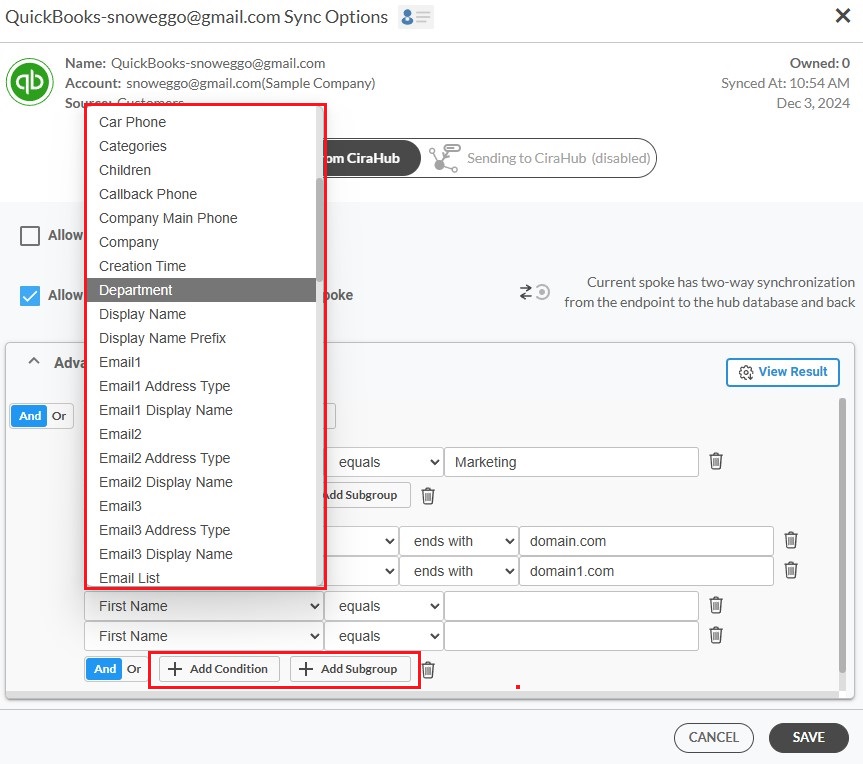
6. In the Advanced settings, click the plus sign next to Subgroups and Conditions to apply filters to your data for your synchronization.
7. If you are syncing contacts, you might create a subgroup for employees in a specific department or customers from a particular region.
Define these filters by selecting the relevant fields (such as department, location, or email domain) and setting criteria that the data must meet to be included in the subgroup.
Subgroups allow you to segment your data by creating smaller, more focused subsets of contacts or other information. Conditions use logical operators like “AND” and “OR” to define the rules that determine which records fall into those subgroups.
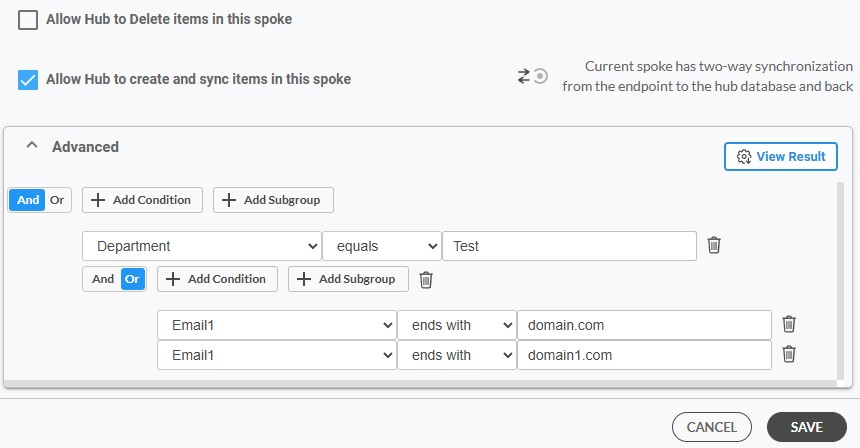
8. Example: Setting Up a Subgroup with Marketing Department and Email Address Conditions
- Define the Subgroup by Department
In CiraSync, subgroups are created by applying filters to segment your data. To begin, set a condition to include only contacts whose Department is “Marketing.” This ensures that the synchronization focuses solely on records associated with the Marketing team.
- Add Email-Based Conditions
Next, refine the subgroup by adding conditions based on the Email field. Use the “OR” logic to include records where the email address containsdomain.comordomain1.com. This means that contacts in the Marketing department with email addresses from either domain will be included in the synchronization.
- Apply Both Filters
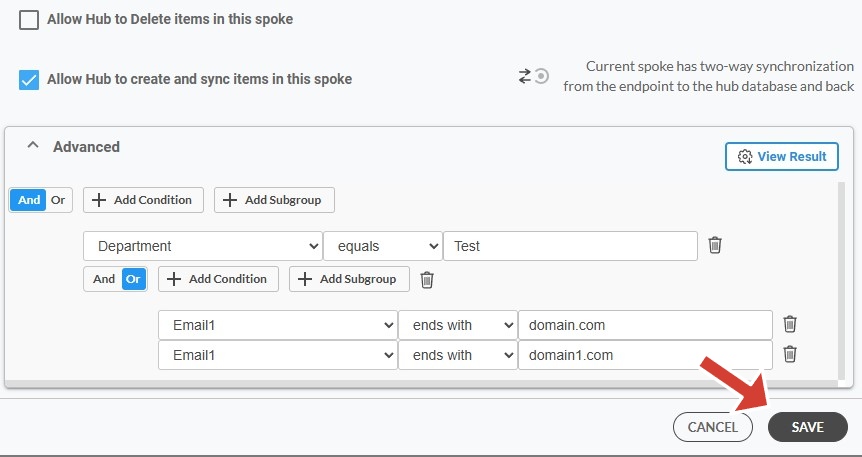
Combine the filters using “AND” logic to ensure that both conditions are applied simultaneously. The configuration would look like this: -
- Condition 1 (AND): Department = Marketing
- Condition 2 (OR): Email contains
domain.com - OR Condition 3: Email contains
domain1.com
This setup ensures that the subgroup includes only Marketing department contacts whose email addresses belong to the specified domains.
9. After defining the subgroups and conditions, click “Save” to apply your changes. The synchronization process will now adhere to the filters and subgroups you’ve defined, ensuring that only the specified data is synced.
