Would you like to be able to view all events on the iCal and an Exchange Server User Mailbox calendars at any time? With CiraHub users can sync multiple calendars together instantly! You will automatically be informed of any changes made to the calendar on iCal or in Outlook if you two-way sync your iCal and Exchange Server User Mailbox calendars. This article will outline how to enable a two-way calendar sync between an Exchange Server User Mailbox and iCal.
Set Up a Two-Way Calendar Sync Between an Exchange Server User Mailbox and iCal
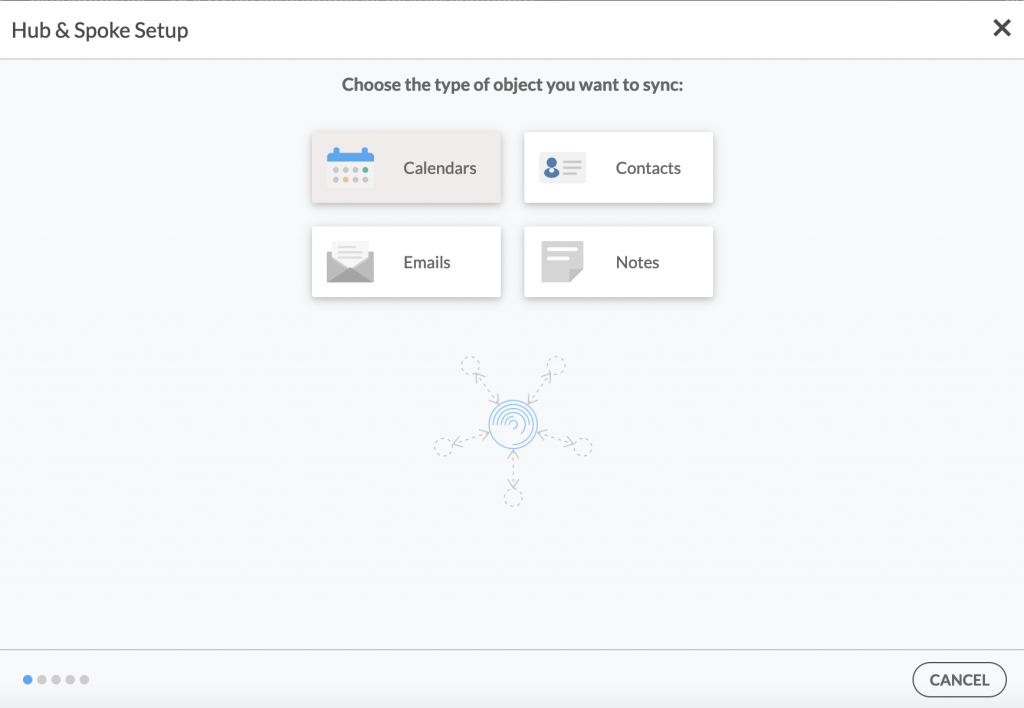
1. Log in to CiraHub. On the Hub & Spoke Setup page, select the Calendars object. Keep in mind that public folders can sync both contacts and calendars.
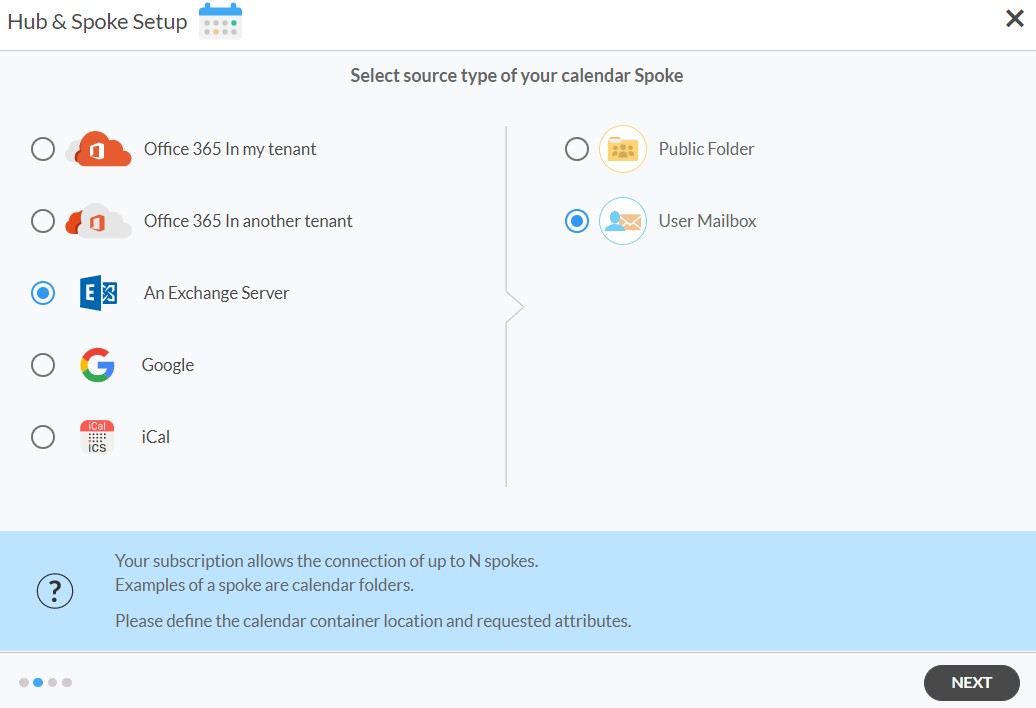
2. Next, select the source type of your contact spoke. To two-way sync an Exchange Server Public Folder, click on Exchange Server and select Public Folder and NEXT (See figure below).
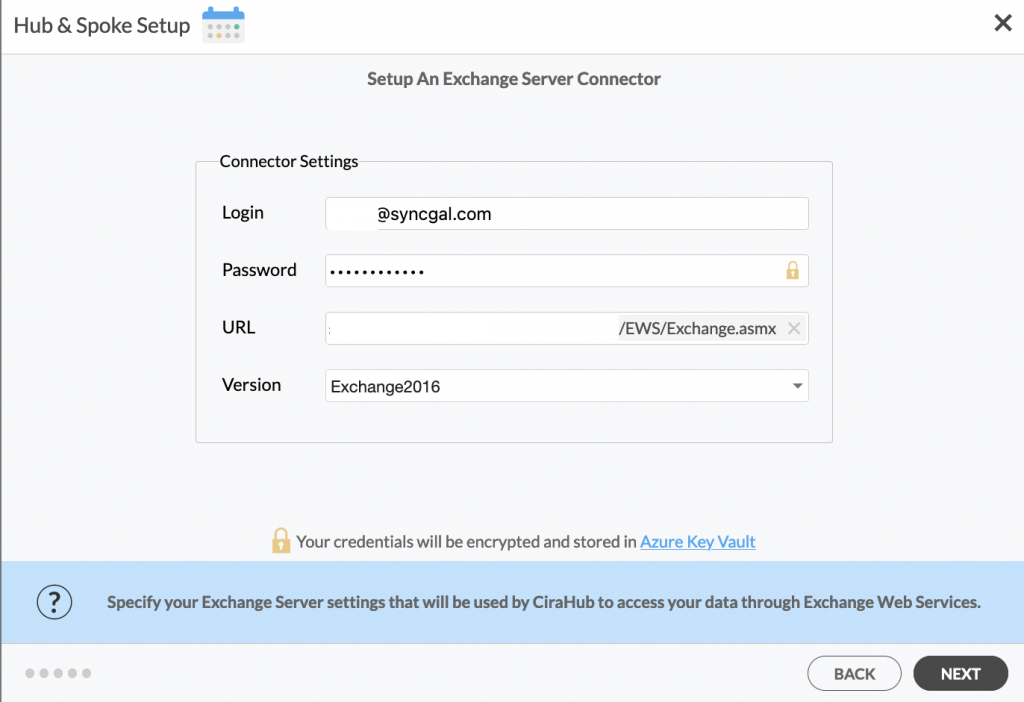
3. Enter your Exchange Server Connector Login, Password, URL, and Exchange Version in order to two-way sync an Exchange Server. If you are running an Exchange Server version dated 2016 or later, always select Exchange 2016 in your connector Settings.
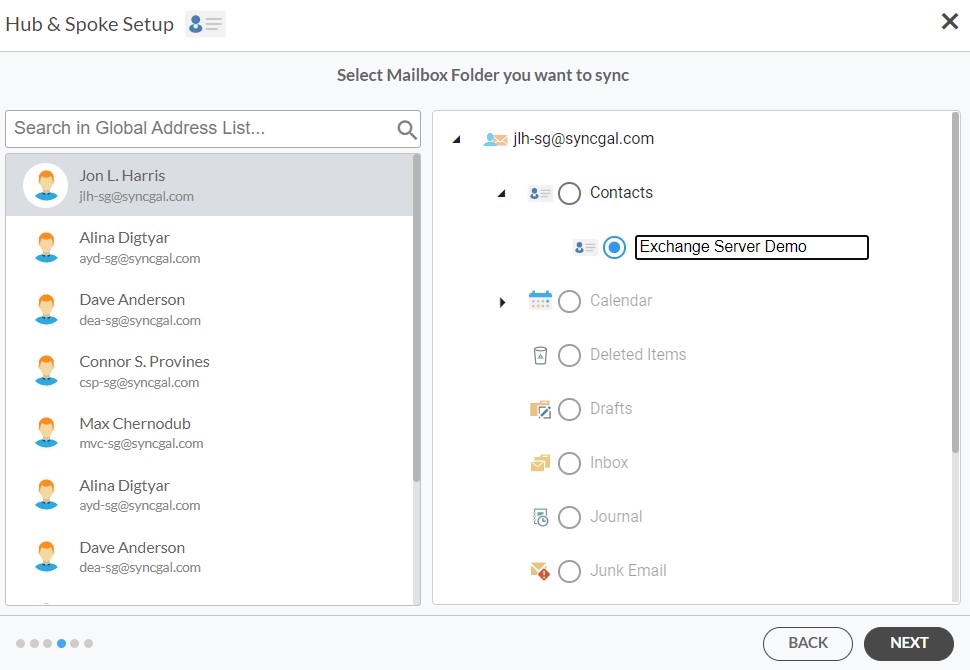
3. Select the Public Folder Calendar you want to sync from the list. Click on the small arrow in front of a subfolder on the right and choose the item or click the green + button to add a new calendar and click NEXT. (See figure below.)
4. Create a name for your first Spoke and click Next. (See figure below.)

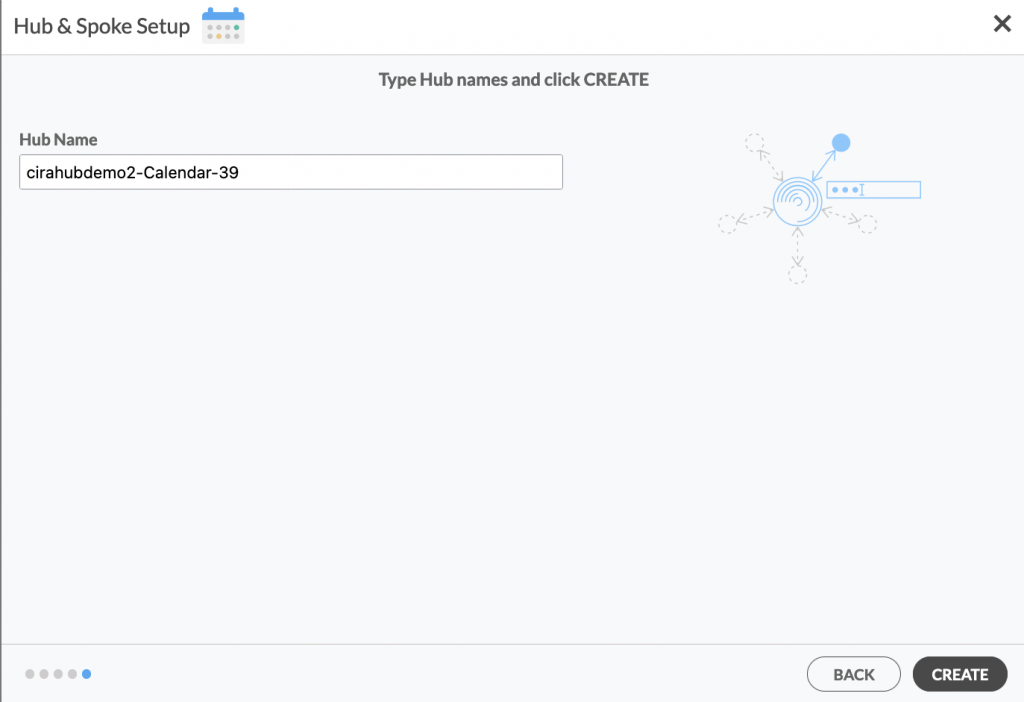
5. Name your Hub, then click CREATE. (See figure below.)
6. On the CiraHub dashboard, click the +Spoke button and select the iCal option. Then, enter your iCal URL and click NEXT.
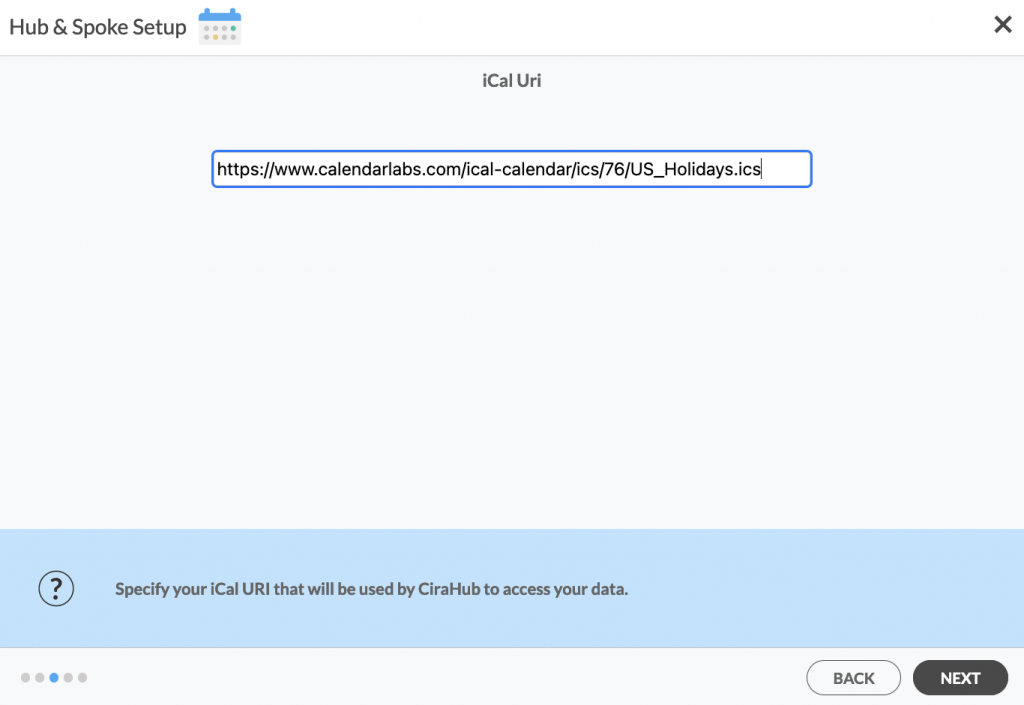
NOTE
Only iCal links ending in the .ics format are valid. Always check for the file extension to allow you to sync Calendar items from that source on CiraHub.
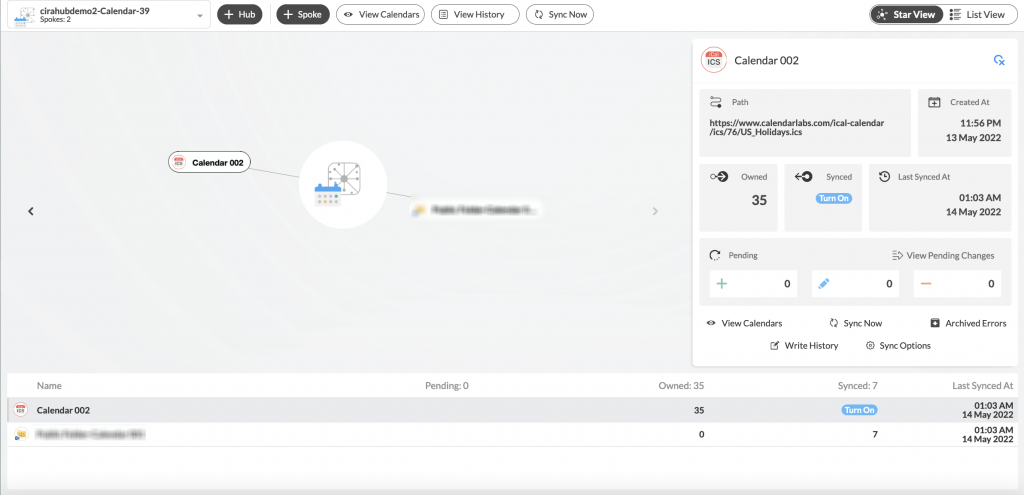
7. Name your new spoke and click CREATE to two-way sync iCal calendars . You should now see two spokes attached to the Hub on the CiraHub dashboard. You can add more spokes as required. (See figure below.)
8. Next, right-click on your Public Folder Spoke, select Sync Options, click Allow Hub to create and sync items in this spoke, and click SAVE. Note that the iCal spoke is a “Read-Only” spoke that allows for one-way sync from the Hub. This means that CiraHub can read but not write or push any information to it. (See figure below.)
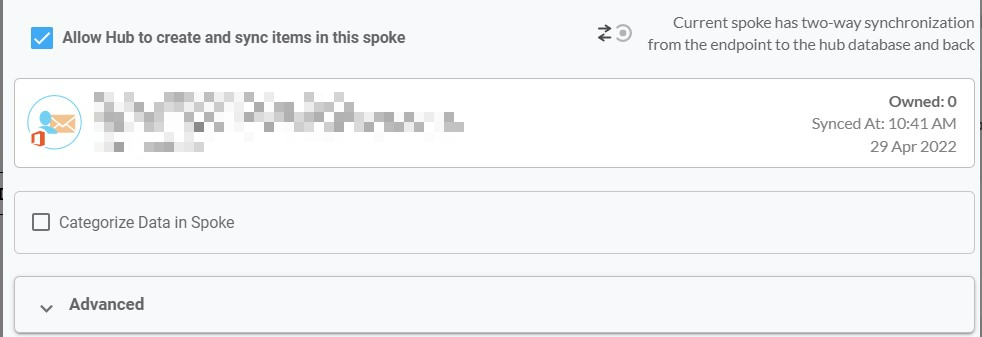
NOTE
Depending on your organization’s needs, you can utilize a variety of additional Sync Options, including private and tentative events, reminders, syncing meetings as appointments, and categorizing data in spokes. You can also edit synchronization settings for each of your spokes using the options at the bottom of the page.
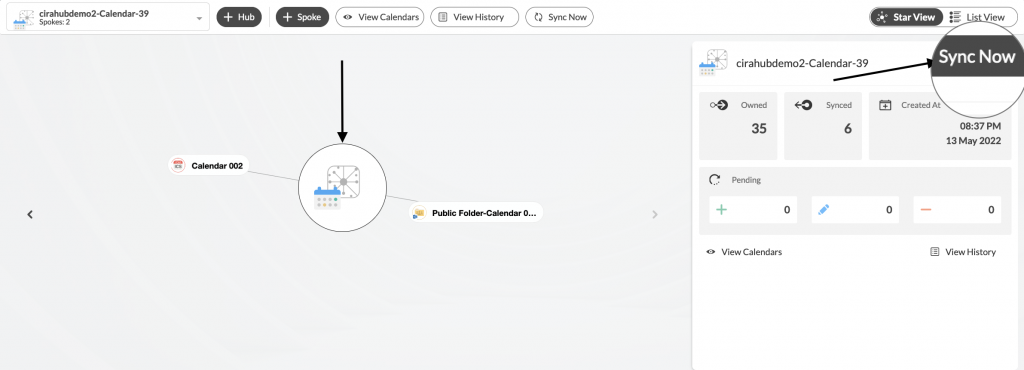
9. On the CiraHub Dashboard, click on the Hub, then click Sync Now to enable a two-way calendar sync between an exchange server user mailbox and iCal. (See figure below.)
Learn More About CiraHub!
CiraHub is a two-way sync platform for shared contacts and calendars for Microsoft 365, Exchange Server, and other Microsoft Enterprise Applications users. The software is designed to make it easy for people lacking IT expertise to set up shared contact and calendar sync for their company. Click here to learn more about how you can start a CiraHub trial today!
